There is absolutely no doubt about that, breaking into the world of Twitch in 2026 is quite a difficult task to accomplish. Indeed, there are well over 7 million people streaming on the platform on a regular basis, trying to win themselves the attention of other Twitch users. However, there is nothing wrong with the content produced by these people. The problem lies with the platform itself, which makes it hard to attract views and subscribers organically.
As a result, many Twitch users decided to take advantage of the option to buy Twitch followers and/or viewers on the Internet. This, indeed, seems to be a valid solution if purchased through a reliable company that provides active Twitch users rather than bots. In this article, I will discuss why that is the case.
Twitch’s Algorithm Explained: The Problem with Growing on This Platform
One can say that, for the majority of Twitch users, promotion of a new channel is pretty much impossible. As stated above, Twitch is designed in such a way that its algorithm promotes streams that already have views. Thus, if a new channel has no views, it will hardly appear in recommendation lists or show up in categories.
In addition, research shows that Twitch users tend to ignore streams with low viewership rates, which is not surprising. Most of them will choose to watch a stream with 50 viewers rather than one featuring only 2 or 3 people.
All these factors make it hard for new Twitch channels to succeed. The only possible solution is buying followers or/and viewers from trusted companies.
Top 5 Advantages of Using This Service in 2026
Instant credibility – First and foremost, Twitch viewers and/or followers can provide your channel with credibility. Indeed, most Twitch users think of a channel with 5,000 followers as being more credible and trustworthy than one having only 50 followers.
Better visibility – Since Twitch tends to promote channels with high views and subscriptions, Twitch viewers will make your channel more visible to other users.
Faster Affiliate status – To get a Twitch Affiliate status, one needs to reach 50 followers, 3 average viewers, and stream for 500 minutes. The latter two are easier to achieve compared to growing your follower count to 50, which may take much time.
Easier growth – Once your channel gets established and becomes more attractive to other people, it is more likely to grow organically. Hence, initial Twitch followers will serve as a basis for more significant growth.
More earning potential – With a greater number of subscribers, Twitch users will start to notify other users about your streams, which may lead to earning money from your channel.
Top 5 Advantages To take
Higher ranking – Twitch ranks streams according to viewership. Hence, with more Twitch viewers on your channel, you will be higher in category rankings, thus becoming more visible.
More viewers – People want to watch something interesting. Therefore, Twitch streams with higher view rates can draw more people’s attention, and make them want to watch your channel.
Chat dynamics – Streaming to an empty room is hard for anybody. Even if there are a few Twitch viewers in your chat, the atmosphere changes dramatically. Furthermore, it makes other users feel like joining in the conversation.
Attractive to sponsors – When a brand wants to make some investment into the development of a Twitch stream, the number of viewers matters. Thus, a stream with 50–100 viewers looks more attractive compared to one with 2-3 viewers, although their content may be identical.
Positive impact on algorithm – Similar to viewers’ number, Twitch algorithm tends to give higher priority to channels with higher viewership rate. Thus, Twitch viewers’ purchase is another tool to get recognized.
Is It Safe? What Will Happen If Twitch Detects Bots
Yes, but only if you purchase viewers from the right company. In other cases, the service can be quite dangerous since Twitch strictly controls bot activities and bans accounts that use them. Therefore, there is always a risk that your account may be blocked if you use any kind of bots. This, however, should not be considered a threat since purchasing from a reliable company involves only genuine Twitch viewers.
How to Purchase Twitch Viewers or Subscribers Safely
When using a service for Twitch promotion, please pay attention to the following factors:
Only real users are purchased; there are no bots involved.
There is no need to share your password.
Subscriptions and/or views are added gradually, not instantly.
The company operates legally; hence, you know exactly how much you pay.
Customer support is available at all times.
Refund policy is clearly stated.
How Many Times Should I Purchase Twitch Followers or Views
Once again, there is no exact answer to this question. Generally speaking, Twitch newbies should get a necessary boost initially to make their channel more attractive. Later on, it might be useful to promote certain streams with viewers’ boost. More experienced Twitch users, however, use services like these much less often, and regard them as a marketing tool.
Twitch in 2026: How Things Have Changed and Why This Approach Works
First and foremost, Twitch is much more crowded nowadays than it was back in 2018. Besides, there are more competing platforms that attract creators as well as viewers. Hence, Twitch has become much more difficult to break into.
On top of that, it is more difficult now to grow organically because of the increase in number of channels. Therefore, such solutions become quite relevant because they give Twitch channels a chance to attract their audience initially. One can say that it is the same as promoting an online store via advertisement. Some users adopt that strategy, while others prefer to wait until they grow organically.
Deciding between Twitch and Kick is one of the most important decisions a streamer might make in 2026. Both platforms have their own strengths and weaknesses, but their purposes couldn’t be more different. Whether you are starting out or need to grow faster as a streamer, this article is a comprehensive guide to everything you need to know.
What is Twitch?
Twitch is the largest live streaming platform in the world and was founded in 2011 and acquired by Amazon in 2014. It is mostly used for gaming but also offers other categories such as Just Chatting, music, and creative arts. As of early 2026, Twitch has around 140 million monthly active users. Obsbot
Twitch is the go-to platform for streamers for over a decade now; however, this is not the case anymore.
What is Kick?
Kick is a relatively new live streaming service. The service was launched in 2022. The service got traction due to the much more lucrative monetization model it offers compared to Twitch. Kick now boasts of having 57 million total registered users as of early 2025. OneStream
The service was also able to poach popular Twitch streamers like xQc, Adin Ross, and Amouranth. They took millions of their fans with them.
Twitch vs Kick: Audience Size
In the category of audience size, Twitch still has the edge. As of data collected by Streams Charts as of late March 2026, Twitch boasts of having 1.4 billion hours of watch time over the last 30 days. Kick has 472 million. However, with a larger user base comes more competition. On Twitch, you will have to compete with millions of other streamers. On Kick, you will have much less competition. This will give you a bigger chance of getting discovered if you are a new streamer.
Twitch vs Kick: Monetization
This is where Kick really outshines Twitch. This is also the reason why Kick has been getting so popular. The service offers a much more lucrative monetization model compared to Twitch.
Let me break it down:
Benefits Table:
Twitch
Kick
Subscription split
50/50
95/5
Ads
Yes
No forced ads
Hourly pay program
No
$16/hour (eligible streamers)
Donations
100% to creator
100% to creator
For most streamers, especially those early in their career, Kick pays significantly more per subscriber.
Twitch vs Kick: How to Become Affiliate
Monetization is one of the most important goals for Twitch streamers. Here is what you need to become an Affiliate on each platform:
Twitch Affiliate Requirements:
50 followers
8 hours of stream
7 days of the week
3 average viewers per stream
Kick Affiliate Requirements:
75 followers
Streams for over 5 hours
Kick’s requirements are less demanding, which makes it easier for streamers.
Twitch vs Kick: Content Rules
Twitch is very strict with its community guidelines. In fact, Twitch has been criticized for not being consistent with the enforcement of these guidelines. Kick, on the other hand, is more liberal with its guidelines. For example, Twitch forbids gambling streams, which is not the case with Kick.
Although Twitch forbids hate speech, offensive content, and any form of illegal activity, Kick might allow you more freedom if your content was restricted in the past.
Twitch vs Kick: Stream Quality
Kick has a maximum stream quality of up to 4K, whereas Twitch has a maximum quality of up to 1080p at 60fps.
Twitch vs Kick: What Should You Choose?
The honest truth is, it all depends on what you want!
Choose Twitch if you want maximum reach and brand building.
Choose Kick if you want maximum money, less competition, and maximum content freedom.
Choose both Twitch and Kick if you want maximum reach and money simultaneously.
Streaming on both Twitch and Kick at the same time is called “multistreaming,” and it is allowed on both Twitch and Kick simultaneously as of 2026.
Want to Grow Faster on Either Platform?
The toughest part of being a streamer on either Twitch or Kick, or both, is getting maximum followers and viewers from scratch. Many streamers use services to get their streams going from scratch.
At StreamerPlus, we provide streamers with real Twitch followers, YouTube subscribers, and Kick viewers, so you can focus on making great content while your viewership grows from scratch.
StreamerPlus Products
Boost Your Streaming Growth
Real followers, viewers and subscribers — delivered fast
Final Thoughts Twitch CEO Dan Clancy and Kick Director Ethan Wright both acknowledge that live streaming is on the cusp of a big growth phase in 2026, as more creators than ever build communities on these platforms. Whether you go all-in on Twitch, Kick, or both, the most important thing is to start streaming and be consistent.
Starting a Twitch channel is pretty straightforward. But knowing the best twitch streaming times and getting those all-important eyeballs on your channel is oh-so-challenging.
Unfair, isn’t it? But the pros here at Streamerplus are dab hands at getting brand-new streamers views and followers, exponentially growing their channel. And yes, we can do it for you too.
However, you can implement a few tactics to expand your viewership yourself, too — understanding the best times to stream is one of them.
Best Live Streaming Times
Aim to stream on Twitch between 11 am and 2 pm Pacific Standard Time (PST) for maximum viewership. This period boasts peak viewership numbers, giving you the highest potential number of eyeballs.
But be warned, that’s not necessarily the perfect time for new channels to stream.
Why?
Because you’ll face a ton of competition.
The brains at Streamerplus recommend new channels to stream between 12 am and 9 am PST. During these hours, the number of other live channels drops, meaning you don’t have to battle thousands of other streamers to grab those views.
Plus, you’ll still benefit from global viewership, particularly in the Americas, Africa, Asia, and Europe.
When is the Best day to Stream?
As you might expect, the best days to stream on Twitch in 2026 are Saturday and Sunday. But like the opportune streaming time, you’ll face bucketloads of competition.
So, if you’re just starting your Twitch journey, we recommend days with the lowest number of other live channels. These are:
Monday
Tuesday
Wednesday
The above works as a general guideline. However, Twitch is all about connecting with your audience. So, ideally, you need to find out when your target market is watching and aim to stream at that time.
Twitch’s golden hours may not work for your local audience (i.e., people in your time zone).
Therefore, answer the question, “when is your audience free to watch” by figuring out when they’d be awake and not at school or work.
Once you know that, you can decide whether to split your streams throughout the day or do one long broadcast.
But there are more things you need to do to fully answer your burning questions “how to get recognized on Twitch” Luckily, our team at Streamerplus can help you gain much-needed views and followers right now.
The Best Days to Stream on Twitch
Finding out the best day to start streaming will depend on what type game you want to play. If you’re open to playing different games, we recommend using the twitch tracker to find any good game that has the highest viewership per channel ratio. You want to be guided and choose a game with a high viewer-to-channel percentage. This will be likely to lead to more viewers. Of course, nothing is guaranteed but knowing that there is sometimes a less competition for a highly watched game. You can take advantage of this when you’re being strategic.
How to Grow After Choosing Best Days and Time to Stream
Okay, so we’ve talked about the best date and time to stream, but how do we take that information and use it effectively for our channel growth? Well, the very first thing you want to do is make sure you stream in a category that has fewer channels. Starting your streaming journey on twitch with fewer channels is one of the great ways to gain more viewers. You could be the best entertainer, you could be fun, you could have great content, or your channel could look beautiful. But if no one’s going to find your channel because it’s flooded with so many other streamers, it will not help you grow.
It will mean nothing if you think about streaming on twitch during peak hours. You’re probably competing with the big streamers who have a community of loyal viewers. That’s why you should start streaming to categories that have fewer channels, as it’ll allow you to grow your channel and gain recognition. If you’re not a regular streamer out there, one of the best things on twitch you can do is start streaming during the weekends, early mornings, and nights.
We’ve already stated one of the best times is between 12 midnight and 8 am, but on the weekends, some kids stay up late and they want to watch live streams, which is the best time for you to gain their attention all right, so we’ve got your best time best day and even tips that help refine that. But you got to make sure you stay consistent.
Be Consistent After Choosing the Best Day and Time
Let’s talk about that for a quick moment and give you some tips. To stay consistent with your streaming schedule, you must be realistic about your goals and schedule. Make sure you find a game you’re good at or passionate about. This will help you avoid burnout. Many believe streaming when big streamers are online in the same category will ruin your overall discoverability. Still, if you adjust your timing when big streamers go offline, you can gain many viewers. Consider considering this when those channels are looking for someone new to watch.
Avoid prime-time hours, as streaming on twitch along with fewer twitch channels enables you to gain more organic twitch viewers. Like I said earlier, there are a lot of variables when it comes to the best day and time you have. Life variables plus platform variables, so we always recommend you do your research. Do some analytical work and then pull out all the data to see what it says and use that to your advantage; trust me. It will help. You can start streaming smarter.
What Time of Day Is Best to Live Stream on Twitch?
To answer this question, you need to look at data on the viewers and how that’s curving over time, and then you need to compare that with data in terms of the number of competitor channels. So viewers are in demand, and channels are in supply. So you’re trying to find times when there’s a discrepancy between supply and demand. If you can find a point where the demand is a little higher, but the supply is a little lower, for example, in terms of viewers versus channels, then you can find a caked opportunity to grow by optimizing the time of day you stream.
Using Twitch Stats.
Let’s look at the statistics that is always available on your twitch stats. So if you look at how viewers trend over time on twitch statistics, this is global. The lowest point in the day regarding viewership is at four am eastern time. There’s one-third of the viewership at 4:00 am eastern time on twitch.
As there is at uh 14 o’clock eastern time which is 2 pm eastern time, this is global, by the way. Not just in your local area but globally. This would tell us we need to keep an eye on four eastern. We need to take a look at 14 eastern as well. Those are the two points of interest on this chart that we need to keep in mind, and if we can find a discrepancy somewhere in this data with the high point and a low point in terms of viewership and channels, we may increase our odds of being discovered on the platform.
Conclusion
The odds are in your favor, like supply and demand, which remains consistent during this period. There’s a balance between supply and demand between 6 am and noon on twitch. It stays compatible with the number of viewers, and the number of streamers remains the same during that period which is why that is the sweet spot to stream on twitch if you want to break through.
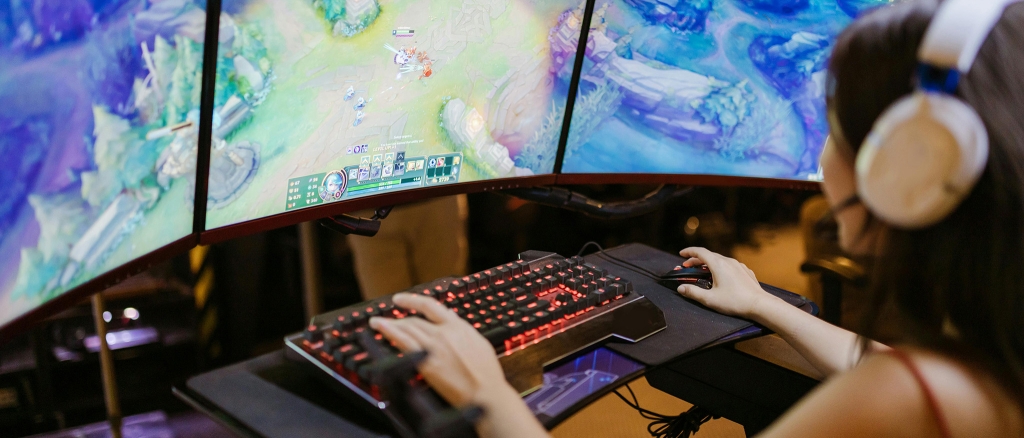
What do Kai Cenat, SpiuK, and Caedrel have in common? If you hang out on Twitch regularly, you’re probably aware they’ve received over 2 million views on their Twitch streams. These creators have also made a name for themselves in the live streaming space with their gaming content.
Why are we telling you this? Because we believe you, too, have the potential to join the ranks of these Twitch creators. We can show you how.
Most Twitch streamers go in blind, get overwhelmed, and give up too soon. But with our helpful guide for beginners, you’ll know how to start a Twitch stream successfully in no time—even if you’ve never done it before.
You’ll learn everything, including how to:
Set up your Twitch account
Select the ideal streaming software (yes, there is such a thing!)
Configure your account’s settings
Make your stream appear more pro-level
Level up your stream’s audio and video quality
Get Started: Setting Up a Twitch Account
Did you know you can start a live Twitch stream using your PC/Mac, mobile phone, Xbox, or PlayStation? No matter what device you use, you must first create an account on Twitch to start streaming.
Here’s how to do it:
Step 1: Head to Twitch.tv and click the “Sign Up” button in the upper right corner. Sign up for a free account using your email address. Pick a username and create a strong password. It doesn’t have to be fancy, although it helps if your username is catchy. To finish setting up your profile, add a profile picture and a snappy channel description.
Step 2: Twitch asks you to enable two-factor authentication to protect your account from hackers and shady logins. To do this, go to Settings>Security and Privacy and set up your 2FA with your phone number. This means you’ll get a code to verify your identity whenever you log onto Twitch.
Step 3: Quickly verify your email, and you’re all set!
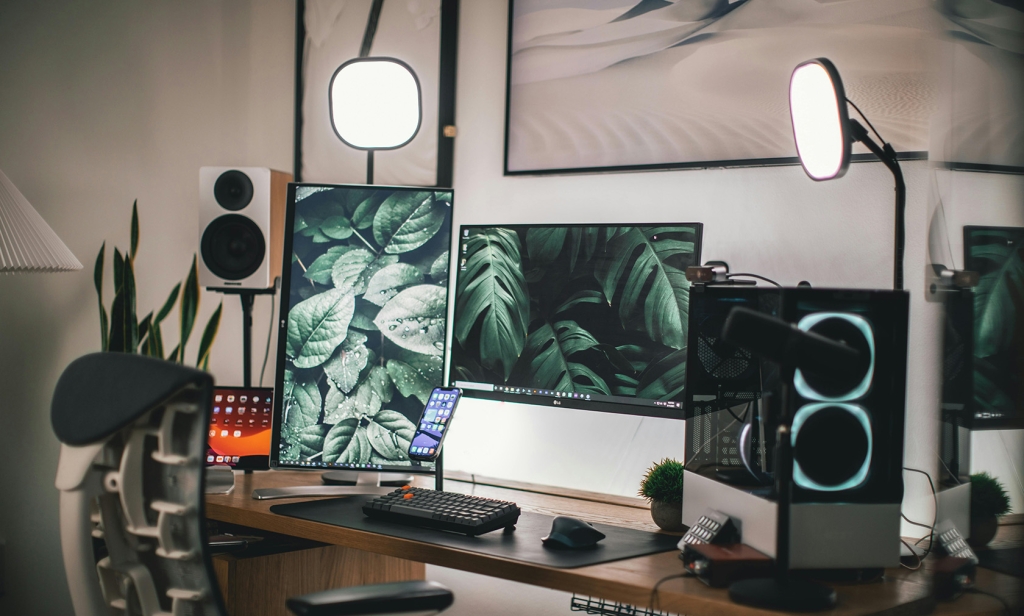
Get Your Equipment Ready
Unlike Instagram and YouTube, where you can create content with basic equipment, streaming on Twitch requires some effort.
These are the equipment and accessories you need to start streaming on Twitch:
Gaming PC
You want a workhorse PC to support your gaming needs. Gaming and streaming will put a significant strain on your PC, so ensure it has the following features:
Minimum 16 GB RAM
Multi-core CPU and graphics engine
Cooling capabilities
Fast SSD for storage
This is pretty basic as gaming PCs go, so you don’t have to go overboard trying to get the latest computer. Just find one that can handle your gaming and streaming activities.
For a basic budget setup, Twitch recommends the ASUS TUF gaming laptop, 15.6” for $999. If you can afford a slightly upgraded version, opt for the ASUS ROG Strix Scar II gaming laptop, 15.6”, starting at $1,999.
If you prefer Mac laptops, the MacBook Pro 13” 8th Gen i5 with 128GB Storage is an excellent option for gaming and streaming. It costs a cool $1,299.
Optional: Some streamers prefer a dual-computer setup as it helps them stream more efficiently. One works as a streaming computer, while the other hosts the gaming content you want to stream. While starting out, you can stick to the basics and invest in a more sophisticated setup later.
Stable Internet Line
This one’s a no-brainer, yet important. Your internet connection should be able to handle your gaming and streaming load. You don’t want a spotty internet connection disrupting you mid-stream, do you? Abrupt freezes, video glitches, and poor viewing quality can turn off even the most engaged audience.
Before streaming, check that your current internet plan is up to the task. If you have a fiber internet service available in your area, consider signing up for one.
Pro tip: Opt fora faster upload speed than download speed when choosing an internet provider.
Streaming Software
Most Twitch beginners don’t know they need to install special software on their PC to stream on Twitch. The purpose of streaming software is simple. It helps you broadcast your audio and video over the internet in real time.
There’s a variety of options available, but you can choose one based on these aspects:
Price
Ease of use
Compatibility with OS
Customization needs
Features available
Twitch recommends streaming software that its popular broadcasters typically use. These include:
Streaming Software
Compatible OS
Pricing
OBS
Windows, Mac, Ubuntu
Free
Streamlabs
Windows, Mac
Free
Lightstream
Windows, Mac
Free and Paid
XSplit
Windows
Free and Paid
OBS is a crowd favorite and a solid choice for beginners. Here’s why:
It consumes lower CPU usage than Streamlabs, allowing you to stream without disruptions.
Many consider OBS the OG streaming software. It has been around for a decade and is compatible with multiple OS—whether Windows, Mac, or Linux. It assimilates system updates quicker, keeping glitches at bay.
It’s 100% free, without pesky paywalls or limitations. Streamlabs and XSplit also have free versions, but you may get access to advanced features like custom overlays and watermark removal only after a paid upgrade.
OBS is a great starting point for beginners, as it’s known for keeping things clean and simple. For example, you can apply plug-ins and custom settings only if and when you want to. You don’t have to deal with complex integrations and dashboards to start streaming.
Even with zero streaming background, you can grasp OBS features quickly. It has tons of helpful tutorials online.
Webcam/Camera
Since video is a major part of Twitch streaming, you need to use a professional-grade camera that can capture you clearly. You can use your computer’s built-in camera or get a moderately priced USB camera. USB cameras are easy to use. Just plug one into your computer for improved video quality. When you grow your channel, you can upgrade to a DSLR camera for professional-level video quality.
Here are some budget to mid-range webcams under $100 to consider for your streaming needs:
Logitech C920S Pro HD Webcam: from $54
JLab JBuds USB Webcam: $80
Logitech C922 Pro HD Stream Webcam: $99.99
Depstech 4K HD Webcam: $69.99
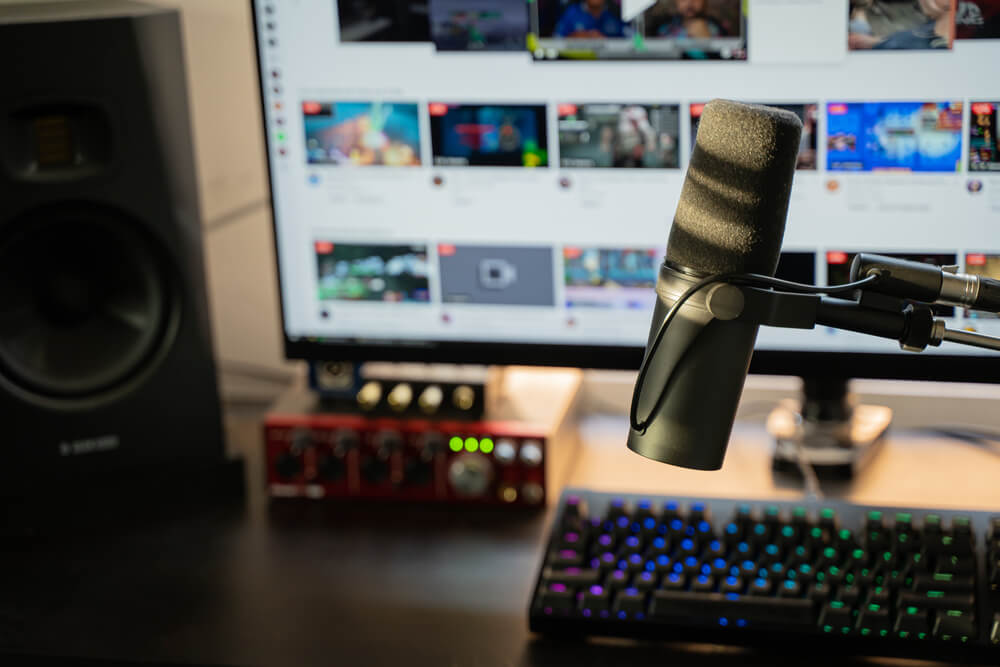
Microphone and Headphones
Your audio commentary can make or break your Twitch channel. Use a good-quality microphone to ensure your audience hears you and is hooked onto your every word. Regular Twitchers use these options:
Similarly, headphones are a must-have accessory in your Twitch streaming toolkit. They give you direct feedback on your audio quality during gameplay. You can also better adjust and monitor stream alerts and game audio while wearing headphones. The result? Better streaming experience for everyone. Here are a few budget options:
Anker Soundcore Life Q30 Wireless Headphones: $79.99
Audio-Technica ATH-M20x: $49
Sony WH-CH520 Wireless Headphones: $59.99
Optional Gear
Additional lighting if you have a poorly lit studio
USB mixer or interface to sync your mic and computer
How to Stream on Twitch From Various Devices
Now that you’re all set, let’s move on to streaming. We show you how to stream on Twitch from any device.
How to Start a Twitch Stream From Your Mobile
The best part about streaming from your mobile? You don’t need streaming software like you would for PC-based streaming. Just download the official Twitch app from Google Play or Apple and go live directly. Here’s how to go about it:
Log into your Twitch account.
Tap on your account’s profile photo and click the “Go Live” option.
You’ll see two options: Stream Games or Stream IRL.
Choosing “Stream IRL” activates your phone’s camera and lets you start live streaming instantly.
If you choose “Stream Games,” you’ll first need to choose from a list of games you want to stream.
After choosing a game, review and set your preferences for gameplay. Adjust settings for audio, mic, and gameplay volume.
Before broadcasting live, you’ll receive an alert from the app. It explains that Twitch screencasts your device for the live stream and also broadcasts any alerts on your phone. You can activate the DND feature on your phone to avoid this (unless you want the world to know who swiped right on your dating app).
That’s it; just tap “Start Broadcast” to begin your first Twitch livestream.
More Mobile Twitch Streaming Tips for Beginners
When streaming via mobile, use a Wi-Fi connection or a stable 4G/5G connection to avoid annoying lags. Remember that live-streaming can quickly drain your battery. So, check that your phone has enough juice to last you through the stream.
If you want to play around with custom settings, consider using third-party apps. Apps such as Streamlabs Mobile and Prism Live Studio offer options for customization, chat functions, and simultaneous (screen and camera) streaming.
How to Start a Twitch Stream on Your PC or Mac
Download any free streaming software and install it on your computer. Here’s how to stream live from your PC via a streaming software:
If you’re using OBS software, go to Settings>Stream and select Twitch.
Toggle to your Twitch settings, where you’ll receive a “stream key.” Paste this key to OBS.
Sync your mic and webcam to OBS
Click on “Start Streaming” on OBS and go live! Start with a short intro stream to ensure everything works as planned.
How to Start a Twitch Stream From Xbox and PlayStation
If you have an Xbox or a PlayStation, you can stream on Twitch from there! Just follow these easy steps:
For Xbox
Open the Xbox Twitch app and log into your account.
Get the six-digit security code from your Twitch dashboard and enter it when prompted.
Click on “Broadcast” and give your stream a title.
Press A on your Xbox controller to select the “Start Streaming” button. Open a game of your choice and begin streaming.
For PlayStation
Open the Twitch app on your PS and log in with the six-digit security code from your Twitch dashboard.
Start the game you want to play and stream.
Next, choose the “Share” option with your PS controller.
Click on “Broadcast Gameplay” and choose Twitch.
Name your live stream and begin broadcasting.
How to Make the Most of Your Twitch Stream
Worried about technical difficulties interrupting your Twitch stream? Here’s how to pull out all the stops and keep this from happening:
If you can swing it, invest in a video encoder and watch your video quality improve drastically. An encoder (like NVENC) takes raw video output and makes it compatible with streaming.
Wi-Fi is great, but do you know what’s better for streaming? Ethernet cable. It keeps your connection stable and prevents lags, buffering, and pixelation. Connect your PC to the internet router using an ethernet cable and test it out before you start streaming.
For beginners, live-streaming in 4K clarity is a terrific experience. But instead of focusing on the resolution, check out the frame rate. When starting out, aim for at least 720p at 30fps (frame rate per second). However, switch to 1080p at 60fps when you make hardcore gaming content with a lot of movements.
Struggling to gain traction? Consider a simple way to boost your Twitch followers and build a thriving community faster.
Common Twitch Streaming Mistakes to Avoid As a Beginner—And What To Do Instead
Keep Talking: Let’s be honest—it’s possible that your chat will be slow during your first few streams. Most beginner streamers take this as instant rejection and go silent. That’s a huge mistake. Even if there are only a few viewers, talk to them, ask questions, and narrate your gameplay. Keep the conversation flowing, and soon, more people will join in.
Check Your Audio: Many Twitch beginners focus too much on video quality while overlooking something that matters just as much: audio. Do your mic checks and monitor your audio levels before you go live. If you are in a noisy apartment or get echo feedback, fix it with noise reduction software.
Schedule Your Streams: As a beginner, one thing matters above all else while trying to gain engagement—consistency. Some early creators stream five times in one week, only to skip streaming entirely the next. Streaming without a definite schedule will only bring you inconsistent results. Create a realistic streaming schedule and stick to it to build traction.
Be Uniquely You: Look, we get it—starting a debut stream can feel like taking a shot in the dark. Maybe you haven’t found your style yet. Maybe you don’t know the direction your stream will take. That’s okay. Instead of emulating your favorite Twitch streamer, be yourself. Keep it authentic—your streams will be better for it.
Don’t Forget the Stream Title: In their eagerness to start a new stream, beginners almost always forget to add a stream title. This only pushes your stream further down Twitch’s algorithm. Always add a catchy or curiosity-evoking stream title and choose the correct category or game before you go live. A descriptive stream title doesn’t just help Twitch users find your stream but also influences their decision to watch it.
Having trouble getting noticed? You can increase your Twitch viewers quickly, making your streams more visible and engaging from day one.
Make Your Debut on Twitch Today!
Many budding creators waste a lot of time overthinking their debut stream due to low confidence. In reality, streaming on Twitch is really easy once you have your basic setup ready.
So, stop wondering and start streaming! While it may seem overwhelming at first, you’ll realize how fun and rewarding it is once you begin. Start streaming today to expand and grow your Twitch audience quickly!
Decide whether you want to start streaming from your PC, mobile, or gaming station. Download the Twitch app and streaming software if necessary. Create an account, set your audio and video preferences, and start streaming the same day!
How much can a beginner Twitch streamer earn?
Beginner Twitch streamers with around 10 average viewers per stream can earn between $25 to $50.
How much does it cost to begin streaming on Twitch?
Streaming on Twitch is totally free. However, some beginner streamers invest money in technical setup and software.
How long should a beginner Twitch streamer stream for?
There is no golden duration for streaming. However, a consistent streaming schedule is more likely to grab attention and increase engagement. As a beginner, plan to stream for at least two to four hours per week.
Is it legal to play copyrighted music on Twitch?
Twitch has strong community guidelines that restrict the use of music that streamers don’t own during live streaming.
 Twitch
 Convert Twitch Bits to USD
 Find Channel ID
 Buy Youtube Subscribers