As the biggest competitive gaming event Twitch Rivals lets you watch your favorite streamers compete against each other in some of the most popular games on Twitch in 40+ tournaments with prize pools worth thousands of dollars in 2026.
To start with, Twitch Rivals is a tournament series on Twitch itself. The main difference Twitch Rivals has from e-Sports tournaments lies in the fact that it doesn’t use professional gamers to play and show skills, but uses some of the most popular personalities among Twitch streamers and the ones attracting the audience to their channels.
The combination of competitive nature, high stakes involved and participation of the favorite streamers are the factors that make this series special for the viewers. Watching a popular streamer winning a million-dollar tournament with outstanding skills is something no ordinary gamer can provide.
📅 Where It All Began
Twitch Rivals tournament series has started on February 28, 2018. In total there were 38 tournaments held and more than 800 twitch affiliates and partners participated in the competitions.
Judging by this initial part of the story, Twitch Rivals hasn’t been very big yet, however, it still had attracted enough attention and gained incredible popularity over the next few years. Starting from 2019, the organizers have decided to make it bigger, declaring that there would be more than 100 tournaments held that year.
There was also some development regarding the games included, as the tournament mostly involved Battle Royale titles in 2018, however, new titles such as League of Legends, Teamfights Tactics, Apex Legends and others appeared in 2019.
The key milestone in the history of Twitch Rivals occurred in 2019 during TwitchCon in San Diego. Here the first-ever LAN event was organized in order to attract even more audiences and increase their engagement. On this occasion there was held a LAN competition of Twitch Rivals, which included professional players and had prize pool of two millions dollars. Those who took part in this event were such celebrities as Tfue, Dr DisRespect and Grayson Allen.
🏆 The Biggest Events in Twitch Rivals History
Over eight years, Twitch Rivals has produced dozens of memorable events. These are the ones that defined the series.
TwitchCon 2019: The First Large-scale Live Stream Event
This event established the direction where Twitch Rivals were going to evolve further. There were three main games played during this event over the course of two days: Fortnite, League of Legends (with Teamfight Tactics), and Apex Legends. Quite an interesting range of people participated, and it was estimated that around a third of all TwitchCon visitors joined the event in some way. Just the Fortnite team competition alone included well-known streamers such as Tfue, TimTheTatman, Nickmercs, SypherPK, DrLupo, Myth, and NickEh30.
Squid Craft Games: The Streaming Event of All Time Champion
This series of events is widely seen as a defining moment in Twitch Rivals history. Inspired by the popular Netflix show and played in Minecraft with 200 participants, the first event set impressive viewership records and raised the bar for future tournaments. Squid Craft Games 2, which took place between February 28 and March 5, 2023, also featured 200 participants and remains one of the most followed Twitch Rivals events.
Squid Craft Games 2
“the event brought in around two million viewers” early on and quickly became one of the most watched streaming events. Sapnap won the competition and took home the $100 thousand prize, while Shadoune finished in second place. The participant list included many of the biggest names in streaming, such as xQc, Pokimane, Dream, GeorgeNotFound, Ibai, Amouranth, Moistcritical, Quackity, IlloJuan, and others.
Most of the highest viewed Twitch Rivals events are dominated by the Squid Craft Games series, with Squid Craft Games 2 and Squid Craft Games 3 leading the rankings, followed by Squid Craft Games ft. Komanche in third place.
Rust Team Battle: The Chaotic Twitch Rivals Series
While Squid Craft Games focused more on strategy and structure, the Rust Team Battle series gained popularity for its unpredictability and chaos. These events were less about careful planning and more about raw, unscripted moments that kept viewers entertained. Jericho became a regular participant and brought a strong fanbase along each time, adding even more energy to the matches.
GeoGuessr Duos 2026: The Most Recent Twitch Rivals Event
One of the latest major events was hosted by Joe Bartolozzi. Caedrel and Ludwig came out on top in the Twitch Rivals GeoGuessr Duos tournament, losing just one round throughout the entire competition. They secured the $100 thousand prize and also earned an invitation to the GeoGuessr World Championship 2026 in Berlin. On their way to winning the title, they defeated teams like Yugi2x and Arky, as well as Jynxzi and ohnePixel.
💰 Prize Pools – The money breakdown year by year
The twitch rivals prize pools are highly varied and can range from small scale 25000 dollars prizes all the way up to huge six figure prize pools. Below is a list of some of the largest prize pools held under the twitch rivals program.
Event
Year
Game
Prize Pool
Winner
TwitchCon Fortnite
2019
Fortnite
$1,000,000
Tina, Rhux & 1400pika
TwitchCon League of Legends
2019
League of Legends
$500,000
Multiple Teams
TwitchCon Apex Legends
2019
Apex Legends
$500,000
Multiple Teams
Twitch Rivals Fortnite
2020
Fortnite
$400,000
Multiple Teams
Twitch Rivals Valorant
2021
Valorant
$100,000
Multiple Teams
Twitch Rivals Warzone
2021
Call of Duty: Warzone
$150,000
Multiple Teams
Squid Craft Games
2022
Minecraft
$100,000
AuronPlay
Squid Craft Games 2
2023
Minecraft
$100,000
Sapnap
Squid Craft Games 3
2023
Minecraft
$100,000
TBD
Twitch Rivals Fortnite
2024
Fortnite
$100,000
Multiple Teams
Hunt & Run ft. IlloJuan
2024
Minecraft
$50,000
Multiple Teams
Twitch Rivals Fortnite
2025
Fortnite
$145,000
Multiple Teams
GeoGuessr Duos
2026
GeoGuessr
$100,000
Caedrel & Ludwig
The Twitch Rival prize pools have been happening from may 2018 up until 2025 in various game types and genres. All the prize money that has been accumulated so far is easily into the millions of dollars and stands out as one of the biggest programs for creators in history.
🎯 The Games That Defined Twitch Rivals
One of the things Twitch really got right with Rivals was not tying it down to just one game. Over time, the event has featured a wide mix, including Fortnite, League of Legends, Teamfight Tactics, Apex Legends, Call of Duty Warzone, Valorant, Minecraft, Ultimate Marvel vs. Capcom 3, Chess.com, and Escape From Tarkov.
Because of that, Twitch Rivals has been able to keep up as streaming trends changed. When Battle Royale games were huge from 2018 to 2020, Rivals leaned into that. When Among Us took over in 2020 and 2021, it adapted. Then came the Minecraft boom from 2022 onward, and again, Rivals followed the shift. Whatever game big streamers are playing, Twitch can usually turn it into a competitive event pretty quickly.
Fortnite led the way early on and is still one of the most consistent games in the lineup, with events continuing through 2025. Minecraft became a major part of the most watched period, especially with the rise of Squid Craft Games. Valorant brought in a more competitive and strategy focused crowd. And GeoGuessr, which nobody really expected to take off in this format, has ended up delivering some of the most interesting recent events.
⭐ Notable Streamers and Their Twitch Rivals Records
Streamer
Notable Events
First Appearance
Games Played
xQc
Squid Craft Games, Rust Team Battle, Multiple Events
2019
Minecraft, Rust, Fortnite
Pokimane
Squid Craft Games 2, Among Us, Valorant
2019
Valorant, Among Us, Minecraft
Tfue
TwitchCon 2019 Fortnite, Multiple Fortnite Events
2019
Fortnite
TimTheTatman
TwitchCon 2019 Fortnite Trios
2019
Fortnite, Call of Duty
Nickmercs
TwitchCon 2019, Warzone Events
2019
Fortnite, Warzone
SypherPK
TwitchCon 2019 Fortnite Trios
2019
Fortnite
Jericho
Rust Team Battle, Multiple Competitive Events
2020
Rust, Escape from Tarkov, Minecraft
DrLupo
TwitchCon 2019 Fortnite, Battle Royale Events
2019
Fortnite, Destiny
Ludwig
GeoGuessr Duos 2026 Winner, Chess Events
2021
Chess, GeoGuessr, Among Us
Sapnap
Squid Craft Games 2 Winner $100K
2022
Minecraft
Dream
Squid Craft Games 2, Minecraft Events
2022
Minecraft
GeorgeNotFound
Squid Craft Games 2, Dream SMP Events
2022
Minecraft
Ibai
Squid Craft Games 2, Spanish-language Events
2022
Minecraft, League of Legends
Amouranth
Squid Craft Games 2, Multiple Events
2022
Minecraft, Various
Moistcritical
Squid Craft Games 2, Variety Events
2022
Minecraft, Various
Quackity
Squid Craft Games 2, Minecraft Events
2022
Minecraft
IlloJuan
Squid Craft Games 2, Hunt & Run 2024
2022
Minecraft
Caedrel
GeoGuessr Duos 2026 Winner $100K
2025
GeoGuessr, League of Legends
Jynxzi
GeoGuessr Duos 2026 Semifinals
2025
GeoGuessr, Rainbow Six
NickEh30
TwitchCon 2019 Fortnite Trios
2019
Fortnite
Many Twitch Rivals streamers have appeared in different shows throughout their eight-year run; however, there are those who kept appearing and leaving the most lasting impression.
xQc
is definitely one of the streamers who made the largest number of Twitch Rivals appearances. He was involved in Squid Craft Games, Rust Team Battle, and many others and drew some of the largest audiences ever. Every appearance is event TV thanks to his intensity and his well-known unpredictable nature. Another great streamer whose appearances created huge expectations is Jericho.
One of the most popular characters in all of Twitch Rivals, especially when it comes to survival games, Jericho became one of the stars of Twitch Rivals Rust Team Battle events. He was known for his unpredictable personality, which brought a lot of fun to all Twitch Rivals spectators.
Ludwig
In 2026, Ludwig took first place together with Caedrel in the GeoGuessr Duos event, winning another prize in a series of competitions in the fields of chess, variety events, and others that he took part in over several years.
Sapnap will always be associated with Squid Craft Games 2. This record-breaking event is the brightest moment of all Twitch Rivals history. Among the famous international streamers who participated in Squid Craft Games 2, there was Pokimane.
It takes a lot of time for a streamer to build up an audience capable of attracting attention of brand representatives and leading to Twitch Rivals appearances. However, you don’t have to spend years building up your reputation from scratch. Buying Twitch viewers could help you get noticed.
🌍 How Twitch Rivals Went Global
One of the least talked about breakthroughs in Twitch Rivals’ history has been its global reach. The early tournament were predominantly English-speaking and centered around North America. This was revolutionized with the introduction of the Squid Craft Games series.
The roster included many international streams such as Ibai, AuronPlay, El Rubius, IlloJuan, TheGrefg, and Quackity in addition to the traditional English-speakers such as xQc, Dream, and Pokimane, not to mention some Latin American players from Argentina, Mexico, and Colombia. The end result was a game that would go on to be simultaneously the most-watched stream in several countries at the same time.
This global reach would continue even up until 2025 and beyond where tournaments have been organized specifically to draw communities from both Europe and Latin America. According to Esports Charts, the Squid Craft Games series has been the most-viewed of any Twitch Rivals tournaments to date, by a substantial margin.
📊 Twitch Rivals in 2025 and 2026
Hosting more than 40 events this year, Twitch Rivals remains the best place for live competitive gaming entertainment. In 2025, the Fortnite event hosted 133 participants who competed for $145,000 in cash rewards, making it the largest Fortnite Rivals prize pool in history.
The GeoGuessr Duos event in April 2026 featured a strong line-up of gamers and ended with the overwhelming victory of Caedrel and Ludwig who took home the $100,000 reward and also a VIP spot at the GeoGuessr World Championship in Berlin.
An upcoming Twitch Rivals game tournament will be held in late, 2026. According to the schedule, more events have been planned for the upcoming this year but the schedule is not public yet.
The formula created by Twitch in 2018 – a series of tournaments for streamers rather than for professional athletes – demonstrated great durability over time. After eight years of active use, Twitch Rivals continues breaking records in audience and creating memorable moments for gamers.
🤔 Why Twitch Rivals Matters for Streaming Culture
What Twitch Rivals is really doing is creating a cultural phenomenon that does something that traditional esports has been unable to accomplish before; it makes esports emotional.
The average viewer doesn’t need to know the meta of League of Legends to get excited about a Twitch Rivals League of Legends battle royale. All the person needs to know is which creators he supports. Once the stakes become personal in this regard, it makes each play meaningful.
That is why every single streamer involved in a Twitch Rivals event always experiences an increase in followers and viewers as soon as they participate in such an event. The amount of exposure that is received from participation in just one Rivals event is incomparable to anything else that happens on the platform to a single content creator.
For streamers looking to build the kind of audience that eventually gets noticed by Twitch and invited to competitive events, the path starts with building social proof — real viewers in your streams, a credible follower count, and enough channel activity to get picked up by the algorithm. Our guides on the best time to stream on Twitch and how Twitch Affiliate and Partner programs work break down exactly what it takes to build that foundation.
Frequently Asked Question
Have any questions?
We answer all the top questions about Twitch Rivals.
Still have Questions?
If you need any help, don’t hesitate to contact us.
Twitch Rivals began operations on February 28, 2018 with 38 events involving 800 Twitch affiliates and partners. Twitch Rivals has been running ever since and has now grown to over 40 events annually, reaching up to 2026.
How much money has Twitch Rivals given away?
The total prize fund from all Twitch Rivals events is counted in the multi-millions of dollars. Prize money per individual event varies from $25,000 for minor tournaments to $1,000,000 for major tournaments such as the 2019 TwitchCon Fortnite tournament. The 2025 Fortnite Rivals tournament had a prize pool of $145,000.
Who has won the most at Twitch Rivals events?
A few streamers have received considerable earnings from many tournaments. Sapnap earned $100,000 during Squid Craft Games 2 in 2023. Ludwig and Caedrel each earned $100,000 during the GeoGuessr Duos tournament in April 2026.
What kinds of games are played on Twitch Rivals?
Some of the most popular games played include Fortnite, League of Legends, Minecraft, Apex Legends, Valorant, Call of Duty: Warzone, Rust, Escape from Tarkov, Chess.com, GeoGuessr, and others.
How can I be invited to Twitch Rivals?
Your selection will depend on Twitch’s criteria including viewership, followers, and social presence. Twitch affiliates and partners stand a chance to participate. It would help to create a large audience of genuine viewers and consistent content creator.
Which Twitch Rivals event had the biggest viewership?
Squid Craft Games has the most popular events to date with Squid Craft Games 2 in February – March 2023 achieving over 2 million views during its first few days.
Is Twitch Rivals still going on in 2026?
Yes, the list of events in 2026 is already quite full. There are over 40 Twitch Rivals events planned for the year with an April 2026 GeoGuessr Duos event and Overwatch Showdown among the highlights.
Can any streamer compete in Twitch Rivals?
Twitch Rivals is an invite-only event that depends on Twitch’s criteria of choice. While some Twitch Rivals events have an open qualification round, the main events involve established players and streamers.
As a regular user of Twitch, chances are you have come across both terms used all the time. “Twitch Affiliate” and “Twitch Partner.” People use the two interchangeably, even though that couldn’t be further from the truth. Each program requires a lot more from you and offers completely different rewards.
Knowing the difference between the two can help you immensely regardless of whether you are just getting started in streaming, or you are already at Affiliate level working towards becoming a Partner.
In this guide, you will find everything you need to know about both programs and how you can progress to one much faster than the other.
🎥 What Is Twitch Affiliate?
This is the first tier in the monetization process, and it basically means that Twitch recognizes your channel has gained enough momentum to start making money for itself. And once you become an affiliate, you’ll get some tools that non-affiliates just don’t have.
Getting into the Twitch Affiliate Program requires nothing more than hitting the necessary criteria for membership. If you hit all of those, Twitch will contact you to let you know you’ve been invited.
Twitch Affiliate Requirements
You need to achieve all of the following within a 30-day window:
50 followers
500 total minutes broadcast
7 unique streaming days
Average of 3 concurrent viewers
These are realistic goals for any streamer with regularity. The majority of serious streamers should be able to reach Affiliate level in their first few months, sometimes even weeks. The most difficult goal to achieve will be the average number of concurrent viewers, as streaming into an empty room every day practically guarantees this will not change. This is precisely why a service such as buying Twitch viewers becomes helpful, providing your stream with the minimum amount of viewers necessary to achieve and sustain this average.
👀 What You Get as a Twitch Affiliate
As an Affiliate, the following features are unlocked on your channel:
Subscriptions – viewers can subscribe to your channel in three different tiers, including a monthly cost of $4.99, $9.99, and $24.99. The Affiliate earns 50% of each subscription, meaning you earn $2.50 from each Tier 1 subscriber.
Bits – viewers can use Bits while cheering in your chat, and you will get paid $0.01 for each bit. This is how twitch bits work.
Revenue from ads – as an Affiliate, you can have advertisements on your stream and you can make a percentage of the revenue from the ads shown during your streams.
Custom emotes – you can get up to five different custom emotes starting as an Affiliate.
Channel points – viewers can earn points while watching, and these points are used to get perks that you offer.
Commission on game purchases – when a viewer buys any game through your stream, you get a percentage of the sale made.
VOD Storage – as an Affiliate, your streams are automatically saved for 14 days before getting deleted.
Affiliate only streams – you can conduct streams which are meant for only your paying subscribers.
📅 What Is Twitch Partner?
Being in the Twitch Partner tier is the pinnacle of any Twitch creator’s success journey. This tier only goes to those creators who have established a true following and shown that they always create good content. It has many benefits, including higher income splits, more resources, and the official Twitch Partner badge, which you get along with your channel.
Unlike the Affiliate tier, becoming a Partner does not happen automatically once you meet the criteria. It requires applying via Twitch’s Path to Partner program, after which Twitch evaluates all applications. While meeting the metrics will be helpful, it won’t be enough, as Twitch also looks at the quality and consistency of the content you produce.
Twitch Partner Requirements
In order to apply for the Partner tier, you have to achieve the following numbers in a span of 30 days:
25 hours of streaming 12 unique streaming days 75 average concurrent viewers
The 75 average concurrent viewers number marks the point that most streamers have difficulty achieving. It is a considerable increase from the 3 average concurrent viewers of the Affiliate tier, and it takes a real fanbase to consistently achieve it.
What You Get as a Twitch Partner
The Partner program enhances nearly every feature you already get as an Affiliate, while also introducing additional tools and benefits that aren’t available at the Affiliate level.
Higher revenue split
Affiliates earn 70 percent of subscription money, while partners only receive 50 percent. For a channel that has 500 subscribers in Tier 1, the monthly income will be different by $500 just for subscriptions – $1,750 and $1,250 for affiliates and partners respectively.
Up to 60 custom emote slots
Compare that to 5 for Affiliates. More emotes mean more opportunities for subscribers to express their personalities within your community.
60-day VOD storage
your past streams stay on Twitch four times longer than as an affiliate.
Guaranteed transcoding
Stream quality is determined independently by the viewer and not by their internet connection. Priority transcoding for affiliates is not a sure thing. In contrast, Twitch ensures that Partners have multiple quality options available for their viewers.
Priority customer support
Partners have quick and direct access to the Twitch support team in case of any problems.
Verified badge
The purple tick icon beside your channel name tells viewers and advertisers that you have achieved the highest level of creators on the platform.
Multistreaming
streamres can stream on various channels, including YouTube and Kick, is permitted for partners if they abide by the Twitch Simulcast Policy.
Stream delay controls
useful for gaming in an environment where you don’t want the live stream of your game being used against you.
Stream teams
They can establish official teams for Twitch streaming on behalf of other content creators.
Affiliate vs Partner — Side by Side:
🎮 How to Reach Twitch Affiliate Faster
Affiliate is all about hitting numbers. Here is how to hit the numbers fast and not waste months streaming to nothing.
Consistently stream at scheduled times – Twitch favors consistency. The viewers who have found your channel before will be more likely to return knowing when to expect you. Schedule your streams in such a way that you can realistically commit to it and make sure to be consistent with your timings. Two or three streams per week should be enough.
Choose a less saturated category to stream – streaming Fortnite is basically a losing battle due to the sheer number of similar channels. Choose a different category that has low competition but you like playing. Read our guide on the best time to stream on twitch.
Don’t stop talking – the silence of a stream discourages viewers from staying there. Keep narrating yourself, asking questions, commenting, reacting. One of the easiest ways to retain your audience.
Build an audience on other platforms as well – share clips and highlight videos on social media. It will help you to attract more people to your streams and keep them active. Fast Affiliate is achieved only by those people who actively use more than one platform.
Use viewer boost to achieve your minimums – getting to 3 average simultaneous viewers is probably the hardest thing for most of the streamers who just started.
Building up a channel from scratch is a long process. With the help of a boost service from Streamerplus you’ll give your channel the required head start.
How to Reach Twitch Partner
But becoming a Twitch Partner is an even more difficult task altogether, and there is no automation involved in reaching the necessary numbers. In this section we will provide guidelines for applying to become Twitch Partner successfully.
Be ready for an evaluation well ahead of applying
since Twitch’s manual review process evaluates your channel in totality, streamers who apply for Partner status right when they manage to barely reach the minimum number of viewers often end up getting rejected. As far as general advice goes, most successful applicants have been recommending that one stays above the requirements for at least a month before applying.
Create an atmosphere of professionalism on your channel
production is an important factor when applying to become Twitch Partner. A consistent visual appearance, custom overlays, quality audio — all this indicates that you are serious about what you are doing and have invested significant resources into your work.
Build your community of viewers
a channel that has an active chat, people making in-jokes, and returning viewers for every stream is completely different from a channel which meets just the bare minimum requirements. Engaged community is important for Twitch as its presence implies more stable financial support for streamers.
Keep track of your growth and highlight it
many streamers share their growth statistics with the reviewing committee in their applications to Twitch Partner program. It is not necessarily required, but it can only benefit you to highlight that.
Apply to Partner through the “Path to Partner” dashboard
once you reach the required numbers you will notice “Path to Partner” section in your Twitch Creator Dashboard.
Re-apply if you fail
rejection means that you do not meet the required criteria yet. However, Twitch provides you with detailed explanations why you were turned down and gives you an opportunity to re-apply 30 days later.
Which One Should You Focus On Right Now?
As a newcomer, Affiliate is all that matters. It is realistic, it provides access to the resources needed to monetize, and the experience of reaching Affiliate status itself instills the discipline required to become a Partner.
Should you already be Affiliate, there is some distance between Affiliate and Partner, but it is definitely crossable. The distinction between the Affiliates that go on to become Partners and those that don’t lies not so much in talent, but in the capacity for patience and discipline. The ones who manage to reach Partner status are those that approach Affiliate status as a serious business venture from day one.
Both statuses are worth striving for, but Affiliate is where it starts, and Partner is where the proper income begins. The progression from Affiliate to Partner can be a tremendously gratifying experience for any
Frequently Asked Question
Have any questions?
All questions about Twitch bits answered, below
Still have Questions?
Get all the answer from our sales team who are available 24/7
Is it possible to skip Affiliate and become Partner directly?
Technically it is possible, if you already have a lot of views from other platform sources. For the most part, Affiliate is a mandatory stage, since the skills that will help become successful Partners should be acquired at this stage.
How long does it usually take to advance from Affiliate to Partner?
This depends greatly on the personal efforts of each individual. Some people manage to reach this goal within six months, while others require two or even three years. It all depends on consistency, growing off-platform and community engagement development.
Does Twitch reject any Partner applications for meeting metrics criteria?
No. However, this means that reaching this point allows a person to apply, but not necessarily guarantees the approval.
What will happen to me if I lose my viewership and fall below required numbers as Partner?
As a Partner, you cannot be deprived of your Partner status for one single bad month. If the channel does not maintain the quality and violates rules for a long time, then Twitch might decide to review the channel’s status, although this happens rarely.
Are Partners guaranteed a 70/30 revenue split as a minimum?
Yes, since the standard Partner contract is 70%. Of course, some very high volume Partners have their own agreement with Twitch, which can result in different percentages.
Can an Affiliate stream on another platform along with Twitch?
Of course, because Affiliates do not have any limitations regarding this aspect. Partners have some restrictions according to the Simulcast Guidelines of Twitch.
If you have Amazon Prime, then you receive one free Twitch membership each and every month. Most of the time, no one uses it.
It’s not that it’s difficult, it only takes around two minutes after you learn how. It’s just that Amazon and Twitch don’t necessarily highlight that benefit of Amazon Prime. There are many Prime users who aren’t even aware that it exists.
What Is Prime Gaming?
Prime Gaming, formerly known as Twitch Prime, is an Amazon’s gaming program included as part of any Amazon Prime membership plan. The service includes many bonuses for gamers, such as free in-game items, free PC game to claim, and one free Twitch channel subscription per month. This guide will discuss the latter bonus in more detail.
Your free subscription works exactly as if you purchased a Tier 1 monthly subscription ($4.99 per month). That means that the channel creator will receive the exact amount as from a regular user; however, you get exactly the same subscriber privileges: access to special emotes, ad-free watching experience, etc.
Moreover, your free subscription is renewed once a month, meaning that you can claim a total of 12 months of free Tier 1 subscription, worth about $58. Unfortunately, most Amazon Prime subscribers don’t use this opportunity at all.
What You Need Before You Start
Two things:
An active Amazon Prime membership – be it the normal one or any other version such as the Prime Video or anything else. Student Prime will also do. All of these come with Prime Gaming benefits.
Twitch account – free for signing up on twitch.tv. You only require a user name and an e-mail.
That’s all there is. Nothing else is required. There will be no additional fee or need to subscribe to Prime Gaming.
How to Link Your Amazon Account to Twitch
Before you can use your free sub, you need to connect your Amazon and Twitch accounts. You only have to do this one time.
Step 1 – Access Prime Gaming Load primegaming.amazon.com in your web browser. Be sure that you’re logged in to your Amazon account.
Step 2 – Press “Connect Twitch Account” This button should be visible right away when you land on the Prime Gaming landing page. Tap it.
Step 3 – Log in to Twitch A pop-up window for Twitch logins will show up. Enter your Twitch credentials, or register a new account if needed.
Step 4 – Allow the connection The Twitch platform will request authorization from you. Click Authorize. The link between your two accounts is established.
You only have to perform this procedure once. From then on, you can use your Prime Gaming membership directly on Twitch.
How to Subscribe to a Twitch Channel for Free With Prime
Once your accounts are linked, using your free sub is straightforward.
Step 1 – Visit the channel you wish to subscribe to Open the Twitch app and visit any channel. This person needs to have the Twitch affiliate or partner status for subscriptions to be enabled.
Step 2 – Tap on the Subscribe button There is a Subscribe button placed either under the live video feed or next to the name of the channel. Click on it.
Step 3 – Pick the option Prime Gaming The subscription menu will pop up. Choose between Tier 1, Tier 2, Tier 3, or the free option called Prime Gaming.
Step 4 – Confirm your subscription Tap the Subscribe button to activate the subscription. Your subscription becomes active right away.
And here you go! The streamer gets his share of money from Amazon; you receive all subscription benefits without paying anything.
What Do You Get as a Subscriber?
When you subscribe to a Twitch channel — whether it is with Twitch Prime or a regular paid subscription, you get the same benefits:
Exclusive subscriber emotes — unique emotes that the streamer creates for their channel that can be used in their chat, or even globally on Twitch.
Ads-free streaming — on channels where the streamer offers this service to the subscribers. Please note that some channels may still show ads, even if you have a subscription, by utilizing Twitch’s new ad model.
Subscriber badge — a little symbol displayed next to your name when chatting in the channel, indicating how long you’ve been a subscriber. They advance progressively (1 month, 3 months, 6 months, 1 year, etc.).
Subscriber-exclusive chat access — some streamers restrict their chat only to subscribers at particular times or permanently.
Helping the creator — that’s the one that really counts. By subscribing with Prime, you’re giving the streamer the exact same amount of money from Amazon as a Tier 1 subscription. Your support counts, but it doesn’t cost anything.
No. Amazon Prime includes Prime Gaming, as well as Amazon Prime Video, Amazon Prime Student, and all other variants of Prime without any additional charges.
Can I use my subscription on any Twitch channel?
Yes, as long as the Twitch channel you’re subscribing to uses Twitch Affiliate or Partner subscription buttons. Small streamers who didn’t become Affiliates yet cannot offer their subscriptions.
Does the free subscription pay the streamer the same way as any other one?
Yes, the same $4.99 per month goes to the creator’s account via Amazon – regardless of whether you’re paying for it or not.
Can I use my subscription for supporting a streamer on Kick?
No – subscriptions on Kick aren’t included in Prime Gaming benefits. If you want to help out your favorite creator on Kick, you’ll need to buy subscriptions on that site separately – or check how to buy Kick followers.
What happens to my streak if I miss renewing the subscription?
The stream will give you some extra time (up to several days) after the subscription expiration before removing your subscriber badge. But your streak will reset if you don’t renew the subscription within this timeframe.
Sure, we all know that competition on the platform is fierce. And sure, we understand that getting a decent number of views isn’t easy for anyone who just started. This guide aims to give you actionable tips on getting more viewers on Twitch that actually work, so let’s dive in!
The Basic Principle Behind the Algorithm
First, here’s a brief overview of how Twitch ranks its streams. It’s sorted by the number of live viewers in a particular category. The streams with the highest viewer numbers appear on top. Those streams are then discovered by users who look through the category and decide which one to watch next. Consequently, a stream that appears higher on the list attracts even more views.
With that principle in mind, here are some tips on attracting more views that actually work
1. Strategies That Get More Viewers on Twitch
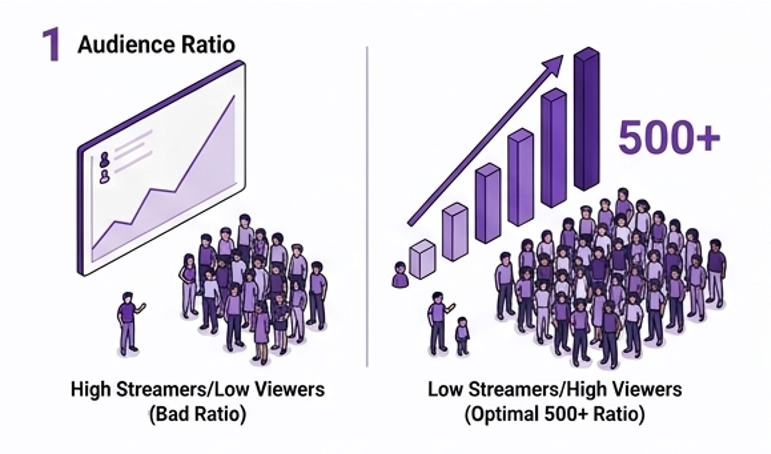
Choose Streaming Games With a Proper Viewer-to-Streamer Ratio One of the biggest mistakes many new streamers make is picking popular games in their categories. For instance, it would be pointless to stream Fortnite or Valorant if your channel has just 10 subscribers because you’ll be competing against dozens, or even hundreds, of established creators who have thousands of followers already. As a result, you’ll barely appear on the category pages, and users won’t even be able to find your stream.
On the other hand, streaming games that have just a dozen viewers and no streamers is equally meaningless because you won’t be able to reach the existing audience and grow your channel. What you want to do is choose streaming games with a large viewer-to-streamer ratio. To do this, check the number of viewers in a certain category and compare it to the number of live streams at the same time. Ideally, your game should have a ratio of 500+.
Understanding the targets that matter helps you measure progress. Here’s what you need to go from Twitch affiliate to partner. When you see if from this perspective the goal does not seem so far fetched.
Milestone
Requirements
What You Unlock
Twitch Affiliate
50 followers, avg 3 concurrent viewers, 500 mins broadcast, 7 unique broadcast days in 30 days
Subscriptions, Bits, game sales revenue
Twitch Partner
Avg 75 concurrent viewers over 30 days, 25 hours streamed, 12 unique broadcast days
Ad revenue, priority support, custom emotes
Monetisation (ads)
Twitch Partner status
Revenue share from ads shown on your stream
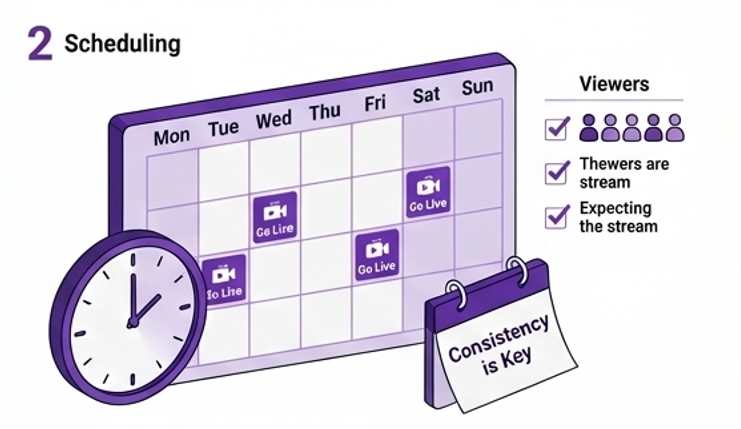
2. Set a Regular Schedule and Stick to It
Consistency is key! It’s crucial for building trust with your subscribers and creating a loyal community that keeps coming back and inviting their friends to join you. So what’s better: live for three hours on Tuesday and Friday, or spend an hour on every single day? In the first case, your viewers will know what to expect from you. They’ll be able to plan their viewing schedule and come to your streams every single time, which is excellent for building a community.
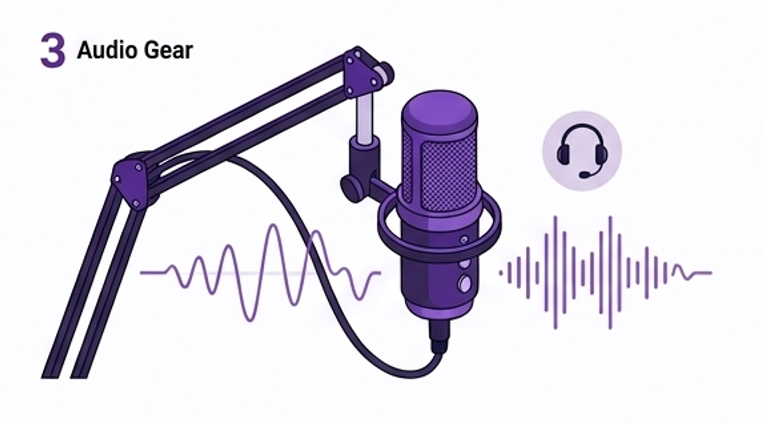
3. Prioritise Audio Quality
This might seem counter-intuitive, but it’s true! While a good-looking stream makes a great first impression, poor audio quality pushes viewers away. It’s fine if your broadcast looks mediocre; however, it’s essential that your audience hears what’s happening in-game. Background noise, bad mic quality, and low volume prevent viewers from enjoying their streaming experience and following the action. As a result, you’ll lose a significant chunk of your viewers.
Invest in a good mic – it can cost just a couple of hundred dollars, and that’s one of the easiest ways to increase viewer numbers. In addition, a good camera will significantly boost the quality of your streams, making it easier to grow your audience.
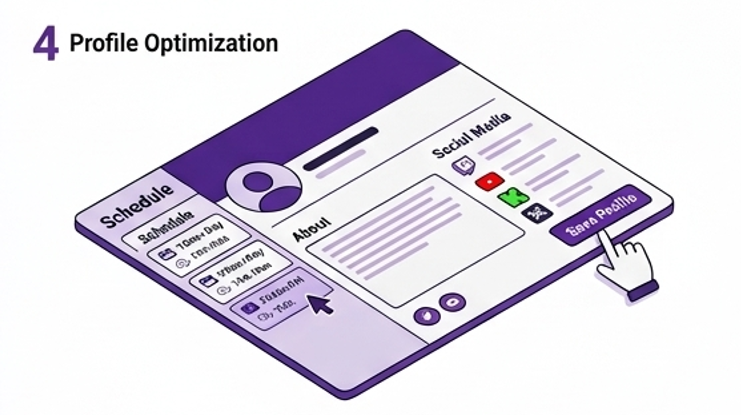
4. Optimize Your Profile and Panels
What viewers see when they come to your Twitch channel is important! It can make them stay and watch your stream or close the tab and never return. So, don’t hesitate to optimize your profile, and fill all the fields with information that interests viewers. Provide your viewers with information on your schedule, gaming style, and interests. It can be a short summary that consists of several sentences.
Also, create panels that provide useful info to your viewers. You can include your schedule and upcoming events, links to your other social media channels, and other useful info that helps viewers interact with you and stay tuned to your latest updates.
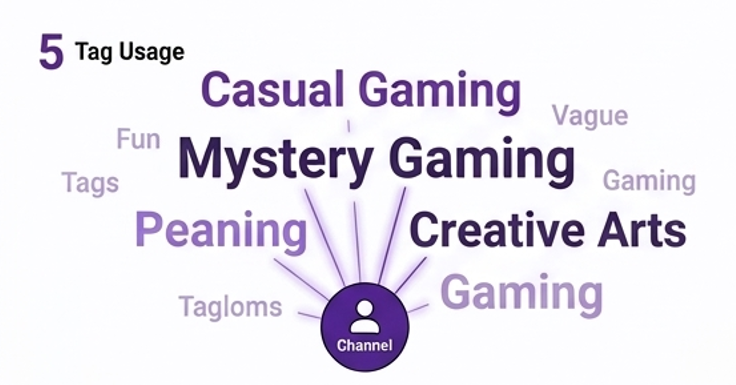
5. Use Relevant Tags
Tags are used by Twitch’s algorithm to determine your content and serve it to interested viewers. Therefore, it’s important to use them effectively to maximize your visibility in the category and grow your audience. For example, avoid generic tags like “fun,” “gaming,” or “streamer” because they’re too broad and irrelevant. Instead, use tags that describe your gaming style or the genre of the game. For instance, “casual gaming” or “mystery gaming” are great tags for your stream.
It might also be interesting to check what tags the leading streamers in your niche are using. You’ll likely discover some trends and learn which tags are most common in your category. Experiment with different tag combinations during several streams and monitor how your discovery metrics change. You’ll likely notice a slight improvement in viewer count if you do it correctly.
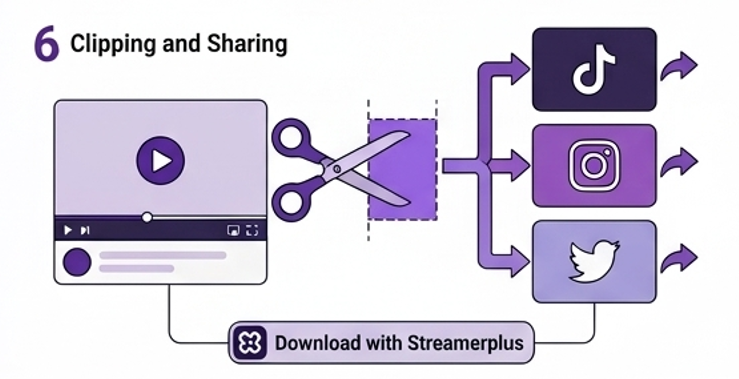
6. Clip and Share Your Best Moments
Your best stream moments can be used for growing your channel even further. Clips make your stream attractive to viewers who have never heard of your channel. For example, you can share your clips on TikTok, Instagram, and Twitter to reach more people in your niche and draw them to your channel. You’ll also have to share your clips with your friends on social media to get more views and grow your audience. It’s a simple and effective strategy that works for all streamers!
Finally, you should invest in your channel and buy Twitch followers and viewers to give your channel a boost and kick off your streaming career. Buying followers and viewers from Streamerplus is an excellent solution for many streamers.
7. Promote Your Twitch Channel on TikTok
Social media is a fantastic opportunity for growing your channel, and there are dozens of effective strategies to implement it. One of the most successful tactics is promoting your channel on TikTok or Instagram. Why not use short videos with your best stream moments? Your clips are already optimized for sharing on other platforms, and that’s what you should take advantage of! Post them on TikTok, Twitter, and Instagram, and use hashtags that describe your channel’s gaming style or genre. In a couple of days, you’ll likely get additional views from social media followers.
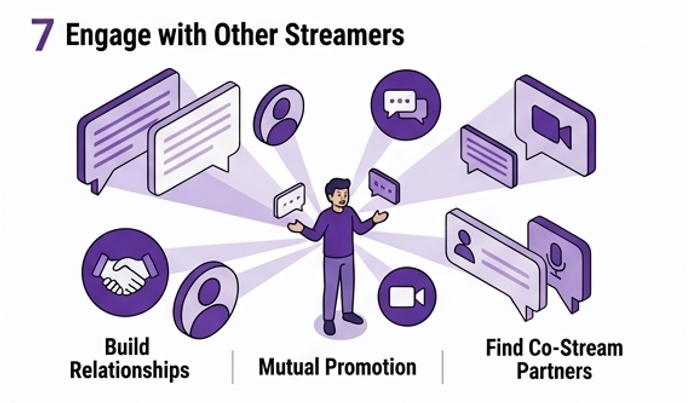
It’s always beneficial to build relationships with fellow streamers in your niche. You can collaborate with them to promote your channel and increase viewer numbers. For example, you can ask your peers to mention your channel in their stream or write a positive review. Of course, you’ll have to do the same to help them promote their channel and build a mutually beneficial relationship. Moreover, you’ll be able to organize co-streams to entertain your viewers with unique content.
“Not sure when your audience is most active? Use our free Find the Best Time to Stream tool to find your optimal streaming window.”
8. Conduct Collaborations and Raids
Collaborations are an excellent way to exchange your audience and gain more views and followers from other channels. It allows you to invite other streamers’ viewers to your channel and get viewers of your channel to join their streams. Both channels benefit greatly from such collaborations because they exchange their audience and get new subscribers. In addition, you can conduct raids and invite your viewers to join other streamers. You’ll likely receive raids in return, and that’s a great opportunity to boost your channel’s visibility.
9. Increase Live Time per Stream
While the optimal time for live streaming is three hours, you should spend five or six hours on your stream per day. You’ll have more time to interact with viewers and provide them with interesting content. More importantly, Twitch will display your stream on category pages for longer periods. Thus, more viewers will find your channel through Twitch categories. Don’t forget that the best moments usually occur at the end of the stream, so you should wait until the third hour to get a unique experience!
10. Host Unique Events
Apart from regular streams, try organizing events that encourage viewers to visit your channel. Such activities may be linked to charitable events, milestones, viewer contests, or themed streams. Hosting unique events will make viewers curious and encourage them to tune in to your channel and participate in exciting competitions or challenges. Moreover, you can create buzz before hosting an event and invite your followers to attend it. It will help you build a community of dedicated subscribers who regularly attend your events and share them on social media.
11. Check Your Stream Metrics
Every Twitch channel has access to valuable metrics, including viewer numbers, follower count, peak viewer count, average viewer count, and chat metrics. It’s vital to check your stats and analyze your performance because it will allow you to learn what you’re doing well and where you can improve. For example, you’ll know which games attract more followers and have fewer viewer drops, allowing you to adjust your gaming style. Overall, it’s a great strategy to improve your viewer numbers.
12. Create a Discord Community for Your Followers
You can host discussions on your Twitch channel and invite your viewers to participate. It’s an excellent opportunity to interact with your followers and share your experiences. In addition, you’ll build strong relationships with your followers and create a loyal community that regularly attends your streams. Finally, your Discord community will help you promote upcoming events and streams, attracting more views and followers. You can easily grow your channel using Discord.
Reading Your Twitch Analytics, What to Actually Look At
Twitch Studio and your Creator Dashboard give you access to several key metrics after every stream. Here’s what each one means and what to do with it:
Metric
What It Tells You
What to Do With It
Average concurrent viewers
Your typical live audience size
Track week over week — consistent growth is the goal
Peak viewers
Best single moment of the stream
What were you doing then? Replicate it
New followers per stream
How many viewers converted to followers
Low conversion = great content, weak branding
Chat messages per stream
Engagement quality, not just viewer count
Low chat with decent viewers = improve engagement
Unique viewers
Total different people who dropped in
Much higher than concurrent = viewers not staying
Hours watched
Total viewing time across all viewers
Divided by unique viewers = average watch time
Starting a Twitch channel is pretty straightforward. But knowing the best twitch streaming times and getting those all-important eyeballs on your channel is oh-so-challenging.
Unfair, isn’t it? But the pros here at Streamerplus are dab hands at getting brand-new streamers views and followers, exponentially growing their channel. And yes, we can do it for you too.
However, you can implement a few tactics to expand your viewership yourself, too — understanding the best times to stream is one of them.
Best Live Streaming Times
Aim to stream on Twitch between 11 am and 2 pm Pacific Standard Time (PST) for maximum viewership. This period boasts peak viewership numbers, giving you the highest potential number of eyeballs.
But be warned, that’s not necessarily the perfect time for new channels to stream.
Why?
Because you’ll face a ton of competition.
The brains at Streamerplus recommend new channels to stream between 12 am and 9 am PST. During these hours, the number of other live channels drops, meaning you don’t have to battle thousands of other streamers to grab those views.
Plus, you’ll still benefit from global viewership, particularly in the Americas, Africa, Asia, and Europe.
When is the Best day to Stream?
As you might expect, the best days to stream on Twitch in 2026 are Saturday and Sunday. But like the opportune streaming time, you’ll face bucketloads of competition.
So, if you’re just starting your Twitch journey, we recommend days with the lowest number of other live channels. These are:
Monday
Tuesday
Wednesday
The above works as a general guideline. However, Twitch is all about connecting with your audience. So, ideally, you need to find out when your target market is watching and aim to stream at that time.
Twitch’s golden hours may not work for your local audience (i.e., people in your time zone).
Therefore, answer the question, “when is your audience free to watch” by figuring out when they’d be awake and not at school or work.
Once you know that, you can decide whether to split your streams throughout the day or do one long broadcast.
But there are more things you need to do to fully answer your burning questions “how to get recognized on Twitch” Luckily, our team at Streamerplus can help you gain much-needed views and followers right now.
The Best Days to Stream on Twitch
Finding out the best day to start streaming will depend on what type game you want to play. If you’re open to playing different games, we recommend using the twitch tracker to find any good game that has the highest viewership per channel ratio. You want to be guided and choose a game with a high viewer-to-channel percentage. This will be likely to lead to more viewers. Of course, nothing is guaranteed but knowing that there is sometimes a less competition for a highly watched game. You can take advantage of this when you’re being strategic.
How to Grow After Choosing Best Days and Time to Stream
Okay, so we’ve talked about the best date and time to stream, but how do we take that information and use it effectively for our channel growth? Well, the very first thing you want to do is make sure you stream in a category that has fewer channels. Starting your streaming journey on twitch with fewer channels is one of the great ways to gain more viewers. You could be the best entertainer, you could be fun, you could have great content, or your channel could look beautiful. But if no one’s going to find your channel because it’s flooded with so many other streamers, it will not help you grow.
It will mean nothing if you think about streaming on twitch during peak hours. You’re probably competing with the big streamers who have a community of loyal viewers. That’s why you should start streaming to categories that have fewer channels, as it’ll allow you to grow your channel and gain recognition. If you’re not a regular streamer out there, one of the best things on twitch you can do is start streaming during the weekends, early mornings, and nights.
We’ve already stated one of the best times is between 12 midnight and 8 am, but on the weekends, some kids stay up late and they want to watch live streams, which is the best time for you to gain their attention all right, so we’ve got your best time best day and even tips that help refine that. But you got to make sure you stay consistent.
Be Consistent After Choosing the Best Day and Time
Let’s talk about that for a quick moment and give you some tips. To stay consistent with your streaming schedule, you must be realistic about your goals and schedule. Make sure you find a game you’re good at or passionate about. This will help you avoid burnout. Many believe streaming when big streamers are online in the same category will ruin your overall discoverability. Still, if you adjust your timing when big streamers go offline, you can gain many viewers. Consider considering this when those channels are looking for someone new to watch.
Avoid prime-time hours, as streaming on twitch along with fewer twitch channels enables you to gain more organic twitch viewers. Like I said earlier, there are a lot of variables when it comes to the best day and time you have. Life variables plus platform variables, so we always recommend you do your research. Do some analytical work and then pull out all the data to see what it says and use that to your advantage; trust me. It will help. You can start streaming smarter.
What Time of Day Is Best to Live Stream on Twitch?
To answer this question, you need to look at data on the viewers and how that’s curving over time, and then you need to compare that with data in terms of the number of competitor channels. So viewers are in demand, and channels are in supply. So you’re trying to find times when there’s a discrepancy between supply and demand. If you can find a point where the demand is a little higher, but the supply is a little lower, for example, in terms of viewers versus channels, then you can find a caked opportunity to grow by optimizing the time of day you stream.
Using Twitch Stats.
Let’s look at the statistics that is always available on your twitch stats. So if you look at how viewers trend over time on twitch statistics, this is global. The lowest point in the day regarding viewership is at four am eastern time. There’s one-third of the viewership at 4:00 am eastern time on twitch.
As there is at uh 14 o’clock eastern time which is 2 pm eastern time, this is global, by the way. Not just in your local area but globally. This would tell us we need to keep an eye on four eastern. We need to take a look at 14 eastern as well. Those are the two points of interest on this chart that we need to keep in mind, and if we can find a discrepancy somewhere in this data with the high point and a low point in terms of viewership and channels, we may increase our odds of being discovered on the platform.
Conclusion
The odds are in your favor, like supply and demand, which remains consistent during this period. There’s a balance between supply and demand between 6 am and noon on twitch. It stays compatible with the number of viewers, and the number of streamers remains the same during that period which is why that is the sweet spot to stream on twitch if you want to break through.
YouTube has built one of the best collections of artificial intelligence tools within YouTube Studio to date but not many creators utilize them to their fullest. However, it’s an important aspect to consider because the tools mentioned below will help you optimize your content, increase the number of clicks, boost watch time, get more views, increase the number of countries where your content gets distributed, etc.
In other words, they’ll be helping you grow. Here is a complete list of the features and ways on how to start using them right now.
Impact of YouTube Studio AI Features on Key Metrics
FeatureDescriptionImpactKey Metric
Inspiration Tab
AI video ideas from your content + comments
CTR +90%
Thumbnail A/B Testing
Test two thumbnails — YouTube picks the winner
CTR +2x
Auto Chapters
AI breaks videos into searchable segments
Watch Time ↑
Auto Dubbing
Dub your videos into 9+ languages automatically
Global Reach ↑
Auto Captions
AI subtitles improving accessibility + SEO
SEO ↑
Bar length indicates relative impact strength
The Inspiration Tab – No More Lack Of Video Ideas!
The Inspiration Tab became one of the most valuable tools to use on YouTube back in 2025 and since then it helped thousands of creators generate great ideas for the upcoming videos. The way it works is pretty simple. All of the features combined with AI technology allow you to get personalized video ideas.
This is not just another “top trending videos” kind of list. Instead, this tab will analyze comments and trending topics related to your niche and provide you with some unique ideas. In other words, all of those ideas will be created according to what your audience is interested in.
As the story says, one creator known as Sambucha (he has over 10 million subscribers on his channel) had tried to use the Inspiration Tab and found out that it recommended him buying products that looked absolutely fake and unrealistic. So, Sambucha decided to follow the suggestion and bought the product that looked like a giant gorilla. To his surprise, it was real and he had to film himself using the sofa. In a few months after that video, the video gained nearly 7 million views!
How to access it: Go to YouTube Studio -> Content -> Inspiration tab.
A/B Test Thumbnails — Let Data Decide What Wins
Thumbnails play the most critical role in your CTRs. Just a couple of percentage points of difference in CTR can have exponential impact in the long run – a video with 6% CTR instead of 4% CTR will attract approximately 50% more views over time with the same impressions.
With YouTube’s new Test and Compare feature, you are able to upload two different versions of your video’s thumbnail and compare performance with real traffic. In the end, the winner gets automatically served more impressions thanks to machine learning algorithms used by YouTube.
It’s like taking all guessing out of the equation because you don’t have to guess what people would click anymore – just test it with your actual audience and see. This tool ranks up among the most advanced tools released for YouTubers by AIR Media-Tech and you can use it right from YouTube Studio.
How to use it: Go to YouTube Studio → Content, select any video of yours, scroll down to the thumbnails, and look for Test and Compare button. Then choose two different thumbnails and wait at least for a week before analyzing the results.
If you wish to analyze thumbnails performance for ideas and inspirations prior to creating your own thumbnails, feel free to use our free YouTube Thumbnail Downloader that allows pulling thumbnails from any video on YouTube with a single click.
Auto Chapters – Make Your Videos Searchable & Watchable
YouTube’s AI automatically analyzes your video’s structure and separates it into labeled chapters with time stamps. As a result, your video receives clickable chapters in the video progress bar, which show up as separate jump links in Google search results. This means that people searching for a sub-topic from your video can immediately get to the exact point that interests them without watching the entire video.
There are two benefits of using auto chapters. First of all, it improves your watch time because it allows viewers to navigate to specific parts they are interested in instead of closing your video. Secondly, each chapter adds an extra keyword to your video’s keyword data in YouTube’s index.
If you have a good structure of your videos (multiple topics discussed), then it is likely that YouTube’s AI will do a pretty good job of labeling video chapters. Alternatively, you can add chapters manually by specifying timestamps in video description.
How to use it: Go to YouTube Studio → Content → Edit Video → More Options, and make sure Allow automatic chapters is turned on.
Auto Dubbing — Connect to a Global Audience Effortlessly
Auto dubbing technology is now live for all creators earning money with their YouTube channels in the YouTube Studio interface. AIR Media-Tech It translates and dubs your video content in several languages including Spanish, French, Italian, German, Portuguese, Japanese, Indonesian, Hindi, and English with others coming soon.
The quality of translation has become so much better compared to the beta version. It still might feel machine generated in some languages but the usefulness of this feature should be obvious to you. A video that does well in English can instantly expand to another audience in Brazil, Japan, Germany, etc. without making any further effort.
Instead of relying on this feature as the final solution for international growth, you should consider using it to discover which language(s) can bring you more views. Once you see that your video gains traction among certain regions, you should focus on making localized videos there.
How to activate: Go to YouTube Studio → Settings → Upload Defaults → Advanced Settings and enable Allow Automatic Dubbing.
Auto Captions — Searchable Videos That Are Accessible Too
YouTube has been providing auto captioning for quite some time but its accuracy and capabilities have been increasing gradually. YouTube automatically generates captions for almost all types of videos, and its AI has made huge improvements in generating transcriptions of difficult accents, speech speed, and technical words.
SEO-wise, auto captions give YouTube AI an entire transcript of the video and that means it indexes every single thing you say in it. An expertly spoken video on a particular subject matter creates its own search index thanks to captions alone. Not only do they allow YouTube to find all relevant information about your video but it also makes it easier for users to find it.
Accessibility-wise, auto captions make your content viewable by deaf and hard-of-hearing viewers, as well as those without audio because of public transportation. YouTube recently rolled out expressive captions that provide an extra layer of context to captions with animations of text.
How to utilize them: Go to YouTube Studio → Subtitles, pick a video, then review and correct the AI-generated captions.
Dream Screen — Visual Backgrounds Created With AI’
Dream Screen is YouTube’s most visually oriented AI feature and it is tailored specifically for Shorts creators. All you need to do is enter your creative idea and Dream Screen creates a background within seconds. AIR Media-Tech Imagine you want to shoot a video of yourself in front of a nighttime Tokyo street or a cartoon world or even a realistic forest scene. You just need to input your idea and Dream Screen creates it for you.
Dream Screen received a major update thanks to the inclusion of Veo 2 AI. Now it allows more realistic short video clips to be created due to enhanced comprehension of complex cinematography techniques. Universal Music for Creators In addition, you can combine multiple dream screens, create 6-second AI-generated videos, and generate animated backgrounds that align with your story.
This feature is currently available in US, Canada, Australia, and New Zealand. In other words, a worldwide roll-out is planned very soon. If you are in a supported country, this feature is an amazing opportunity for small creators with no budget for studio shoots to create stunning visuals.
How to use it: Start a Short in YouTube’s app and select Dream Screen from the background selection menu.
AI Music Composer — Generate Royalty-Free Tracks for Your Video
There’s an AI music composer in YouTube’s Studio right now, currently in its early testing phase. Simply describe the desired mood of the track and let the AI generate the piece of music itself.
It sounds like YouTube is creating a pipeline for its creators where they can generate their own royalty-free music without exiting Studio. This will be very convenient for those creators who currently have problems with YouTube’s Content ID system blocking the background music on some of their videos.
But right now YouTube’s Audio Library contains thousands of completely free tracks that you can use in your videos without having to worry about them being blocked by YouTube. It’s not generated by AI but is organised rather nicely.
Ask Studio — AI Assistant for Your Channel
YouTube introduced an official chatbot powered by AI called “Ask Studio”. The idea here is to give YouTube creators a chance to get some answers concerning their channels directly through Studio. It can answer any possible question related to the features of YouTube and its statistics.
It can help creators solve a problem or understand why their video received certain statistics on YouTube. It’s like an assistant who will give you all the information about your channel and YouTube. TechCrunch
How to find it: Look for the Ask Studio icon (sparkle icon, usually).
How Do They Work Together
The main idea is to combine all of these features into one workflow.
Step
Feature
What it does for your growth
Before you film
Inspiration Tab
Gives you data-backed video ideas your audience actually wants
After upload
Auto Chapters
Makes your video searchable for specific sub-topics
After upload
Thumbnail A/B Test
Maximises CTR with real data instead of guesswork
After upload
Auto Captions
Builds a full-text search index from your spoken content
After upload
Auto Dubbing
Unlocks international audiences with zero extra effort
For Shorts
Dream Screen
Creates professional-looking AI backgrounds without equipment
Work through this checklist on your next upload and you’ll be using YouTube’s AI toolkit properly — most creators still skip the majority of these steps.
Tracking Your Progress
Everything mentioned above affects one basic metric: CTR, watch time, and subscriber count. To monitor progress in these metrics, YouTube provides a detailed overview of clicks, average view durations, impressions, and traffic sources in its Analytics section in YouTube Studio.
For those who prefer up-to-date metrics that show how many subscribers they have compared to others in their industry, our YouTube Subscriber Count tool offers a live view thanks to real-time data retrieval from the YouTube API.
Frequently Asked Questions
Have any questions?
All the questions & answers you’re looking for
Still have Questions
Get all the answer from our sales team who are available 24/7
Is everything mentioned here provided by YouTube for free?
Indeed, the majority of all listed AI features is available for creators absolutely free within YouTube Studio, except when you need to participate in the YouTube Partner Program to monetise your videos.
Do I need a certain number of subscribers to use some of these features?
Mostly no — the only thing is that some features might require your channel to be monetised (Auto Dubbing). Others like A/B testing (Test and Compare) are being rolled out gradually across the platform. The Dream Screen option is currently offered in select countries.
What is going to happen with my SEO when using auto-generated captions?
In case the auto-generated captions contain mistakes, they would harm SEO performance compared to not having captions at all. Please double-check them, particularly when it comes to proper names or products, and adjust the text if necessary.
How long do I need to run a test for thumbnails to see results?
As a minimum, you should wait until your video gets 7 days. However, it is better if the number of impressions is higher to be able to draw statistical conclusions. YouTube selects the winner automatically whenever there is enough data. You are also welcome to do it manually.
Will Auto-Dubbing affect my income?
No, since dubbed videos would serve as separate audio tracks of your original video, while your ads would work normally with any language version.
Very few marketing departments have successfully understood Twitch yet. And it is precisely for this reason that it is an excellent opportunity.
When other businesses struggle to capture viewers’ attention using Instagram and YouTube placements, Twitch becomes even more attractive because of its engaged viewership. The average daily engagement rate per user on Twitch is 95 minutes. This is almost double the average engagement time of any other social media site. Unlike other sites, where users may be mindlessly scrolling through content, on Twitch, viewers actively listen to streamers who are addressing them personally in real-time.
This guide provides detailed information that a business would require when marketing on Twitch in 2026 — including the type of audience, marketing formats, finding influencers, and measuring success of campaigns.
Why Twitch Should be Taken Seriously by Marketers
Statistics speak volumes.
Twitch boasts 240 million monthly active users, 35 million daily active users and holds a staggering share of 91% of the market’s live-streaming content and 76% of total viewing hours. Marketing Agent Blog It earned roughly $1.8 billion of revenue in 2024 Business of Apps through advertising and sponsorship programs alone.
Why does Twitch stand out from any other platform currently being used by marketers? Live engagement is one of its greatest assets. While mentioning your brand will not get buried under thousands of posts on social media feeds, the viewers are immediately engaged, asking questions, leaving comments in the live chat and getting their queries answered right away. It’s impossible to achieve this kind of interaction through a pre-recorded advertisement or even an Instagram post.
Its primary audience comprises younger viewers that are extremely hard to target on other platforms. Twitch reaches a majority of gamers between the ages of 20 to 39 — digital natives raised with internet games and live streaming. Jitendra Vaswani They have developed a tendency to aggressively use ad blockers, skip YouTube pre-rolls in 5 seconds and don’t really believe in traditional advertising. Twitch allows you to reach out to this target audience via sponsorship.
Extraordinary user attention spans cannot be neglected either. The average time spent per day by American Twitch viewers stands at a whopping 95 minutes. Social Shepherd This means your brand stays there for at least 4 hours when mentioned.
Who Is the Twitch Audience?
Understanding the demographics is essential before committing marketing budget to any platform.
Metric
Data
Monthly active users
240 million
Daily active users
35 million
Average daily time on platform
95 minutes
Gender split
65% male, 35% female
Largest age group
20–34 years old
Largest country
United States (23.67% of users)
US users
37.2 million
Average concurrent viewers
2.3 million
Twitch’s typical user is aged 26 years, emphasizing its relevance to an audience that loves real-time and interactive entertainment.
Jitendra Vaswani It is important to observe the gender distribution is 65% men however, there has been a steady rise in the number of women using the platform, narrowing the gender divide in recent times.
Jitendra Vaswani Women-focused brands should not overlook Twitch, especially for product categories such as beauty, lifestyle, and Just Chatting that attract a significantly higher percentage of women viewers.
The most popular categories include:
Category
Average viewers
Just Chatting
309,000
League of Legends
148,000
Counter-Strike
91,000
Grand Theft Auto V
89,100
Fortnite
Varies with updates
Just Chatting’s prevalence holds significance for brands. The prevalence of Just Chatting validates that Twitch isn’t just an avenue for gaming; rather, it is an avenue for entertainment and discussions. As such, it allows room for virtually any brand, beyond the gaming or tech niche.
The 5 Twitch Marketing Strategies for Businesses
(Use the strategy diagram above as a reference as you read through each option.)
1. Sponsorships of Influencers
This is the most efficient and popular marketing format on Twitch. The brand sponsors the streamer in order to promote its products by demonstrating, mentioning or using them during live streaming. There are several sponsorship types:
Dedicated sponsor segments
This type involves a dedicated time in the stream when the influencer will mention the product, use it, show it and provide promo codes. Dedicated segments usually take 2 to 5 minutes. Integration of the promotion into the stream. In that case, there will be no dedicated time in the video, only natural integration of the product which can be, for example, some gaming accessory on the desktop or a drink of the streamer. Such sponsorships are more covert and usually work better.
Panel promotions of brands
It involves placing the sponsor’s link to the website of the brand in the section of panels at the bottom of the screen. There is not too much interaction between the brand and viewers.
Long-term sponsorship
It includes partnership with the influencer for a month or several months. The influencer promotes the product in his/her regular stream. It is the most expensive marketing tactic, but at the same time, it is the most profitable.
How to find the suitable influencers?
It seems logical to think that you should search among the first 50 channels on Twitch. But do not rush: mid-tier channels with 500 to 10,000 concurrent viewers may suit better in terms of the cost-benefit ratio. They already have devoted followers who will trust the recommendation and pay for the product.
Use various services like Creator Camp, Upfluence or Grin to find the best candidates among numerous streams. Also, consider their engagement: viewer to chat ratio plays the key role here.
2. Display Advertising
Direct advertisement options are available through Twitch’s self-service advertisement portal, enabling brands to advertise to the entire audience without going through individual content creators.
Available ad formats: Pre-roll video ads – play before starting the streaming. Highly visible but equally likely to be skipped. Works well as a tool for building brand awareness rather than driving conversions.
Mid-roll video ads – play during the live streaming at time intervals decided by Twitch or the streamer. More disruptive to the experience but also more difficult to avoid. This ad format is widely used, and includes the Stream Display Ad (SDA) – a 15-second video ad displayed before or during the live streaming, making it possible for viewers to still see and listen to the creator while viewing the ad.
Display banner ads – shown alongside the stream. Less engaging but effective for keeping brands constantly present. Homepage takeovers – premium ads taking the main position on the homepage. Extremely expensive and best used for major brand launches or campaign events.
How much does Twitch advertising cost?
On average, Twitch advertising in 2025 costs between $4 and $10 per thousand impressions (CPM). During the November/December peak ad season, Twitch’s cost may increase up to $12+ CPM due to higher competition among game and tech brands. The Social Shepherd Compared to other digital channels, this price range remains relatively competitive.
Even more so when considering the quality of Twitch’s engaged audience. In particular, a CPM of $7 worth of ads targeted at 26-year-olds who spend an average of 95 minutes streaming cannot be compared to the same CPM of any other platform where the users scroll for 20 minutes.
3. Branded Events and Tournaments
It is one of the most effective forms of marketing that is grossly underutilized by brands on Twitch. Any branded event on Twitch will create a particular point in time where the community comes together and engages. Creating clips, highlights, and social media buzz beyond the actual broadcast itself is the ultimate goal here.
Sponsorship of tournaments – Gaming tournaments are often sponsored on Twitch and regularly garner hundreds of thousands of views. In order for the brand to get its name out there in front of an enormous number of people, it has to be relevant to the audience. An ideal match between a gaming peripheral brand and an FPS gaming tournament will resonate far better than most traditional brands.
Branded Challenges – Creating a unique challenge or competition that streamers can participate in is a great way to get user-generated content on the brand. It will give the community something to engage with rather than having a commercial inserted into their game play.
Live Product Launches – A brand hosting a live product launch event with the streamer acts as a host allows for much more interaction with the audience and greater engagement. This is especially useful for hardware or software gaming products.
Charity Stream – The sponsorship or participation of a charity stream garners the best response from the community.
4. Product Placement & Live Integrations
Product placement through Twitch differs from the way product placement works on traditional media platforms. While product placement on traditional media platforms is merely a passive appearance of the logo in the background, product placement through Twitch requires live interaction with the product by the content creator on screen.
By making a live demonstration of your gaming chair, energy drinks, hoodie or software products in a Twitch session, a streamer makes the organic appearance of your products before their engaged audiences.
For an effective product placement, make sure your product placement strategy includes the following elements:
Authentic integration – your product should be naturally included by the streamer in the discussion of something related to your product without announcing it as a promotional opportunity.
Attribution – add the unique discount code or tracking URL to the product description so that you could monitor whether product placement helped convert traffic into purchases.
5. Creating a Branded Twitch Channel
An even more ambitious plan which might yield incredible returns in the future is establishing a branded Twitch channel – something that would give the brand its own presence in the community that could develop organically in time.
A number of well-known brands have managed to do that. For instance, Red Bull has created their own Twitch channel full of athlete content, sponsored gaming events, and non-commercial content, i.e., things that are really entertaining and useful to watch.
Creating a brand channel takes serious effort and time.
One needs to come up with a consistent content creation plan, hire good creators, and invest in promoting and growing the channel over time. Yet the result will be worth the trouble since one gets to create an entirely owned brand presence in the Twitch universe.
Your audience
Stream what your audience actually wants to watch. Don’t create streams based on your products. A tech brand should consider competitive gaming. A food brand should organize live-cooking challenges, etc. Hire a streamer/creator who can actually stream and represent your brand online.
First and foremost, think of your audience and their expectations. You don’t want your channel to look like just another advertisement.
Metrics for Evaluating Twitch Marketing Strategy Success
Measurement tends to be one of the biggest concerns businesses have when considering Twitch marketing.
How can you determine its success?
The following metrics are essential:
Metric
What It Measures
How to Track
Unique discount code redemptions
Direct conversions from sponsored streams
Your own analytics
Tracking link clicks
Traffic driven to your site
UTM parameters
Stream clip views
Content reach beyond the live audience
Twitch analytics + social
Chat mentions of your brand
Organic brand discussion during stream
Twitch chat monitoring tools
Follower growth during stream
Audience responding to brand association
Channel analytics
CPM vs conversion rate
Ad efficiency vs other channels
Platform ad dashboard
Earned media value
Total organic reach generated
Social listening tools
The most reliable measurement framework combines a unique discount code (for direct conversion tracking) with UTM-tagged links and post-campaign social listening to capture the full picture of earned media generated by the activation.
Twitch Marketing vs Other Competitors
How does Twitch stack up against the platforms most marketing teams are already using?
Platform
Avg daily time
Audience age
Ad format
Trust level
Twitch
95 minutes
18–34
Live sponsorship, display
Very high (creator-led)
YouTube
40 minutes
18–49
Pre-roll, display, influencer
High
Instagram
30 minutes
18–44
Stories, feed, influencer
Medium
TikTok
52 minutes
16–34
In-feed, spark ads
Medium-high
Twitter/X
31 minutes
25–49
Promoted posts, display
Low-medium
Twitch beats its competitors in engagement by a large distance, and the element of trust created by creators is the greatest of all platforms. However, there is a drawback, as the size of the total audience on Twitch is lower compared to Instagram and YouTube. In this regard, Twitch must be viewed as a supplement to other strategies.
Tips before Getting Started with Twitch Marketing
Start small. Launch a pilot project for 30 days with one or two mid-tier streamers. Gather all data on their effectiveness.
Do not script streamers as if they were employees. Instead, provide some guidance to give them creative freedom.
If you as a business want to try out streaming for yourself, you can! Streamerplus have a great guide on how to stream on Twitch for individuals and businesses.
Check audience quality, not just quantity. A 2,000-person active audience is better than a 50,000-person passive audience of people outside your target demographic.
Time it with the viewing peak. Plan your campaigns on the evenings of Fridays and Saturdays, major game releases, or esports events when viewership is at its peak.
Use YouTube as well. Make sure that your streamer publishes clips from your ad as extra videos after their broadcast.
If you’re also working on growing your own Twitch presence alongside your marketing strategy, buying real Twitch followers and viewers from Streamerplus can help you establish the credibility that makes brand partnerships more attractive to potential sponsors.
The Bits currency on Twitch is probably one of the least understood features on the platform. Most viewers understand they exist, but very few realize that they can be earned for free, without putting up even a penny.
Be you a viewer looking for ways to donate some free Bits to a streamer without losing your money, or just a curious streamer who wants to learn more about Bits currency, this guide will provide all the essential information you need to know.
What Are Twitch Bits?
As we have already mentioned, Bits are a type of virtual currency in Twitch. Unlike a subscription, Bits are a one-time donation that viewers can make to their favorite streams on the platform. Each Bit is worth $0.01, meaning 100 Bits are $1 for the streamer, 1000 Bits = $10, and so forth.
When you donate your Bits to a streamer (also known as cheering), you’re basically making a monetary donation of the corresponding sum along with an animated emote. Thus, when someone cheers for the first time, he or she should type the word “Cheer” and the amount in dollars in the chat. Then press enter, and your contribution will be sent to the recipient’s Bits account.
The main advantage of Bits over traditional subscription model is that it allows users to donate whatever amount they want and whenever they want to. It provides streamers with additional means of gaining some extra cash.
Are you planning to cheer soon and would like to calculate in advance how much it will cost you? No worries, we have developed a special calculator where you can convert any amount of Bits into USD in just seconds! Click here for more information.
How Much Does it Cost to Buy Bits on Twitch?
As mentioned above, the cost of Bits on Twitch depends on the amount you purchase. As you can see from the following chart, the more Bits you buy, the cheaper price for each Bit you get:
100 Bits – around $1.40

500 Bits – approximately $7.00

1,000 Bits – roughly $10.00

1,500 Bits – approximately $19.95

5,000 Bits – around $64.40

10,000 Bits – approximately $126.00

25,000 Bits – roughly $308.00
It should be noted that first-time customers will receive a better rate while buying Bits. Also, depending on your region and platform (buying on desktop or mobile device) you may face slight variations in the price of Bits. Buying Bits on mobile devices, specifically through iOS and Android apps usually cost more due to commissions from the application store. We hope this article was useful in answering your questions on Bits prices. Now let us explain how you can get your free Bits.
How to Earn Free Bits on Twitch There are several legitimate methods to get your free Bits on Twitch. Let us discuss them in detail.
Method #1 – Watching Video Ads on Twitch
The easiest method of earning free Bits is watching video ads on the Twitch website. The platform offers the opportunity to earn from 5 to 100 Bits per view, and most users usually receive around 5 to 10 Bits.
In order to use this method, follow the instructions below:
Open the Twitch site and go to any channel page that has the Bit currency enabled. Click the diamond shape Bits icon at the lower right part of the screen. Select “Get Bits“ Choose the “Watch Ad” option. Watch the video fully and then wait for the update of your Balance tab.
You can perform this activity up to once per hour or until you reach a certain daily maximum number of video ads. The number of videos you can watch is not public but, according to rumors, it is renewed daily starting at midnight PST. Therefore, you are advised to watch your ads right after midnight in order to maximize the amount of Bits gained.
Important: The “Watch Ad” button becomes gray after exceeding the daily limit, so if you encounter this issue, you should stop watching ads. Also, some streamers do not allow watching ads for Bits in certain countries. If you encounter such a problem, you can try using a proxy server or a Virtual Private Network (VPN).
Method #2 – Completing TwitchRPG Surveys
TwitchRPG is Twitch’s official research panel. Viewers can participate in various surveys on this website and earn free Bits in exchange. Typically, you are offered to complete a survey and earn around 500 Bits for your participation. Note that Twitch does not offer Bit rewards on all surveys; the survey with Bit reward is marked with “sponsored.” In order to participate in TwitchRPG, visit rpg.twitch.tv, register with your Twitch account and verify your e-mail address.
Important: Only people from selected countries and with aTwitch-affiliated account can join TwitchRPG. TwitchRPG is located in the United States and offers surveys only to residents of these countries. Therefore, if you’re unable to log in or see the list of surveys, you should use a proxy server.
Now that your registration is finished, you can start receiving emails with notifications about new TwitchRPG surveys. When the new survey opens, visit rpg.twitch.tv and click it as soon as possible in order to receive a Bit reward.
Note that there is a limited number of Bit-reward slots per month. If you’re quick enough to complete a survey before slots run out, you will receive your Bits automatically.
Method #3 – Google Opinion Rewards
This method, although a bit indirect, can be helpful for viewers seeking some extra Bits on Twitch. Google Opinion Rewards is a popular service offered by Google that lets users complete short surveys on their smartphones and receive Google Play credits as their rewards. Each survey typically takes less than one minute and yields $0.10 to $1.00.
After you complete one or two surveys, visit the Google Play Store and redeem your credits for Bits. For users of the Android platform, the process can be accomplished easily. However, iOS users should install Google Opinion Rewards app on their Apple device. After doing so, you will be able to redeem your credits for Twitch bits on the iOS version of the app.
Method #4 – Twitch & Amazon Prime Rewards
Finally, if you are Amazon Prime member and have subscribed for Twitch Prime, you can also get some free Bits as part of promotions or bonus activities. Note that this method won’t produce a regular source of free Bits since Bits are occasionally offered by the program. Nevertheless, visiting the Amazon Prime Twitch dashboard from time to time might bring unexpected surprises to you.
How to Cheer on Twitch
Once you have earned or bought some Bits, you can donate them to any Twitch streamer. To donate some Bits to someone, enter “Cheer” and then the number of Bits in the chat. Thus, if you want to send 1000 Bits to someone, just write “Cheer1000“. Note that some streamers may have minimum donation amount, so pay attention to the details. Also, besides plain Bits donations, you can use cheermotes (emotes for Bits donation) to make your donation more visually attractive and interesting for streamers. Different amount of Bits correspond to various cheermotes on Twitch.
If you wish to know beforehand how much is your contribution going to cost you, use the Twitch Bits to USD Converter provided by us.
How Do Twitch Bits Work for Streamers
Let us talk now about streamers who receive Bits donations on Twitch. For streamers, each Bit represents $0.10 cent of revenue, and you can check this info in your account’s Creator Dashboard. Bits from donations appear as Credits. Note that you don’t need to worry about any hidden commission; every single Bit received corresponds to one cent, no exceptions or nuances whatsoever.
The amount received from the donations is paid monthly starting from the moment you received $100 worth of Bits. You can request payment in any of the following options: PayPal, check, wire transfer or ACH payments. For streamers, it’s necessary to meet two requirements: first, they must be Twitch Affiliate or Twitch Partner to receive Bits. Second, it’s important to enable Bits cheering on the channel.
Enabling Bits is rather easy and takes only several steps:
Note that it takes some time after you enable the feature until the system processes it. So be patient!
Why is it Important for Your Channel’s Success
As you have already noticed, we recommend streamers to turn on the Bits donation function on their channels. Why is it so important for success on Twitch?
Firstly, as a streamer, you can monitor the total number of Bits donations, track the popularity of your channel and compare your progress with other Twitch channels. Secondly, as a streamer you are interested in creating a community. Bits donations promote the idea of community building since usernames of contributors are highlighted in chat, and they appear to be donating emotes. That helps to create a positive atmosphere of mutual help and friendship among the members of the community.
Thirdly, people who are long-time Bit contributors on your channel usually form a core of your community and thus help to preserve other members of the community over the years.
That said, for the new streamer it’s extremely important to have some initial base of followers on Twitch in order to receive some contributions. In StreamerPlus we can help you to get some of them! We offer affordable packages with real Twitch followers and viewers for every streamer regardless of the channel’s niche.
Need more help in your Twitch channel’s development? Read about the best time to stream, or find out why Twitch still beats Kick in 2026.
Frequently Asked Question
Have any questions?
All questions about Twitch bits answered, below
Still have Questions?
Get all the answer from our sales team who are available 24/7
There is no official daily maximum limit of Bits for ad-watching. However, from our experience, the limit varies from 50 to 200 Bits per day. We recommend you watching ads right after midnight PST to avoid hitting this limit.
Do Bits expire on Twitch?
No, Bits don’t have any expiration date and you can use them for any donation as long as you wish.
Is it possible to transfer Bits to another Twitch user?
Unfortunately, it’s impossible to transfer Bits to another person. Twitch keeps track of who donated what and it makes transferring Bits impossible.
What’s the minimum Bit donation?
It is 1 Bit; however, you can set minimum Bit donation for yourself in your channel’s settings.
Do streamers get 100% of donations?
Absolutely! Every Bit donated costs streamers $0.01 and no hidden fees apply here.
Is it possible to earn Bits on mobile devices?
Yes, the first method described in our article works on mobile and web platforms equally. The second method can only be used on computers.
How Does a Twitch View Bot Work? The Complete Guide
If you’ve ever hung around on Twitch, you know all about viewbots. They pop up whenever there’s an anomaly like a stream with an absurd number of viewers with no activity in chat. Or they appear when an insignificant channel ends up right at the top of its respective category for seemingly no reason. We are going to take an honest look at this.
This guide will detail what Twitch view bots are, how they function, why streamers use them, the ways in which Twitch catches them, what consequences come from getting caught using them, and finally, what the more intelligent ways to proceed actually are.
What Are Twitch View Bots?
View bots for Twitch are automated tools meant to generate false views for your Twitch streams by creating connections that simulate viewing time. In place of real individuals choosing to watch your stream, a series of automated programs will automatically connect to your stream to create the appearance of more popularity.
The concept is relatively easy to understand. View bots work by establishing connections to your Twitch stream through automated accounts via constantly changing IP addresses, which will be counted as different viewers. OnPattison When the Twitch website sees these bots connecting to your stream, it simply sees another individual loading up your stream on their web browser.
On the simplest end, view bots could be nothing more than automated scripts making connections to your stream link. However, more advanced bots could even simulate realistic actions by users, such as varied watching times and steady increases in traffic OnPattison .
Why Do Streamers Use View Bots?
In order to comprehend how view bots work, it is important to learn one fundamental aspect about Twitch: all categories rank streams depending on the number of concurrent views. The streams that have the most viewers end up at the top. At the top, those streams become visible to everyone else.
Visible streams attract more genuine viewers, which only makes the cycle stronger. Essentially, streams that get more views are rewarded by Twitch with increased discoverability – at the expense of the streams that just started out. People who rely on view bots to increase their popularity have several reasons behind the actions:
Discovery – Increased numbers of viewers move the streams closer to the top of categories’ rankings, which allows others to discover the streams while browsing Twitch. Nobody wants their channel to appear at the bottom of the category; therefore, view bots can be a solution to gain visibility in a particular category.
Social proof – Streams with 50 views appear more appealing than streams that have only 3 views. It is simple psychology: people tend to follow others.
Sponsorships and partnerships – Average concurrent views influence brands’ decisions about whether they want to collaborate with certain Twitchers or not.
viewers make a stream more interesting for brands – hence, it becomes more valuable.
Milestones for Twitch affiliates and partners – Twitch Affiliate requires 3 average concurrent views per month. Twitch Partner requires 75.
How Do Twitch View Bots Actually Work?
This is what the technology behind the services looks like:
Step 1 — Creation of bot networks There are huge networks of accounts or even just anonymous connections used by view botting services. There are two major types of them. First of all, there can be bots using legitimate Twitch accounts created especially for their purpose. Secondly, bots are able to access stream URL via browser automation.
Step 2 — IP address rotation IP addresses can be easily identified in order to detect bots. Therefore, the most important part of using view bots is having them connect to Twitch streams via huge pools of residential and data center proxy IPs, thus changing location for every new bot.
Step 3 — Imitation of viewer behavior In addition to opening the connection, some services provide the opportunity to control certain aspects of this behavior in order to increase natural appearance. This includes increasing numbers gradually, varying the period of sessions, and some bots can even interact with the stream via chats. OnPattison
Step 4 — Count maintenance Bots will occasionally disconnect from streams because of detection and timeouts. In addition, some other bots might just disappear. The key task is to replenish the count of viewers to keep up with the desired number.
How does Twitch recognize View Bots?
Twitch has been actively investing in anti-bots technology through the years. By 2026, Twitch uses highly sophisticated artificial intelligence algorithms to detect bots based on viewer activity. Viewbotter
This is how Twitch detects viewbots:
Signal
What It Reveals
Viewer-to-chat ratio
Real viewers chat. 500 viewers with 0 messages is a red flag
IP address patterns
Multiple connections from the same IP or suspicious IP ranges
Account age and history
New accounts with no activity showing up in viewer lists
Session behaviour
Bots tend to join and leave in unnatural patterns
Follower-to-viewer ratio
600 live viewers but only 80 followers is statistically implausible
Geographic distribution
Traffic coming entirely from one country or data centre cluster
Engagement scoring
No channel point redemptions, no reactions, no clip activity
Daniel Clancy, the CEO of Twitch, himself acknowledged the fact that detecting viewbots was a never-ending process, saying, “It is a bit of a cat and mouse game as third parties seek to avoid our detection.” X
The biggest anti-botting update by Twitch came in August 2025. It resulted in a fall of up to 22% in the total number of views on the website because the new coding algorithm was identifying fake activity. Viewbotter Many streamers found their viewership reduced drastically overnight.
How to Identify a Viewbotting Twitch Channel
How to Tell If a Streamer Is Viewbotting
If you think that a certain twitcher uses view bots, pay attention to the following things:
Chat without messages, reactions, or channel points despite numerous viewers — This should be your number one tip-off. If there are 300 people watching the channel yet nobody is chatting in the chat box, the chances are extremely high that they are just bots.
Too many live viewers compared to followers — It is hard to believe, for example, that there are 600 viewers at once if there are only 80 followers. As soon as Twitch viewers enjoy a streamer, they are likely to subscribe to his channel.
Unusual viewer growth patterns — Natural growth of any kind is gradual. If a channel goes from 5 to 500 viewers between two streams but doesn’t have any raids, shoutouts, and other similar activity, then something seems odd.
Quality of viewer lists — There are public lists of bot accounts on sites such as Twitch Insights that can be found on every viewer list. If most of the streamers’ viewers are in this list, then a viewbot is highly likely.
Social Blade indicators — These include rapid spikes in the number of followers or view counts disproportionate to subscriber amounts.
What are the consequences of getting caught?
The penalties for viewbotting vary depending on how much evidence is available:
Consequence
When It Happens
Viewer count correction
Automated — Twitch silently removes detected bots from counts
Shadowban
Reduced algorithm distribution without notification
Affiliate/Partner denial
During application review if engagement history looks suspicious
Temporary suspension
Clear evidence of intentional viewbotting
Permanent ban
Repeated violations or large-scale manipulation
Loss of monetisation
For Partners caught using bots
It should also be noted that viewbotting is not only an act performed by streamers upon themselves. Twitch itself has admitted that bots have been used to harass some streamers by directing fabricated viewers to the streams and getting the streamer investigated and, consequently, damaging their reputation. X Should your viewers spike for no apparent reason, you may be under attack instead of being the attacker.
Why View Bots Are Not the Solution To Start With, the Issue That Needs Solving
Ignoring the Ban Threat Aside From being against the rules, view bots do not actually address the issue that streamers are trying to solve.
do not interact – they do not subscribe, donate, use bits, and provide any sort of profit. A stream running with 500 fake subscribers and none real makes zero money, receives zero subscriptions and donations, and creates zero clips.
The algorithm works based on interactions, not mere viewer statistics. Twitch’s algorithm rewards streams with active chat, active clip creators, and active subscriber base – not necessarily large numbers of views. Channels that pump their viewer stats without providing interaction get penalized by algorithms because their numbers are fake, hence they should not be promoted.
It is difficult to determine which parts of content to optimize when using numbers from fake subscribers, since there is no way to tell how many are actual subscribers who enjoyed the stream.
The Smarter Alternative — Real Viewers From Real People
There is an obvious reason why there are view bots: the cold start problem on Twitch is really tough. Starting from scratch takes time and effort; the algorithm doesn’t acknowledge you at first; you have to struggle a lot until the snowball effect begins and things become easier.
But what to do about the issue? View bots aren’t the answer to the problem. What needs to be done is getting real viewers. Getting real Twitch viewers on Streamerplus ensures that your account is being boosted with real, active Twitch users, not view bots, not automated bots or any kind of bots. Getting real people watching your streams is the key to increasing views and getting the word about your channel out.
Why does it matter? It matters in many ways — for example, real viewers cannot be detected by the system because they are not bots but real Twitch users; they are able to talk with you and watch you longer; and they also help improve your algorithms performance on Twitch.
So, how to solve the problem of cold start on Twitch without using view bots?
Let’s take a look at some differences between the two solutions:
View Bots
Streamerplus Real Viewers
Real Twitch accounts
No
Yes
Risk of ban
High
None
Algorithm benefit
Minimal
Yes
Chat engagement
No
Yes
Sustainable growth
No
Yes
Monetisation safe
No
Yes
Frequently Asked Question
Have any questions?
All questions about Twitch bits answered, below
Still have Questions?
Get all the answer from our sales team who are available 24/7
While it is not an activity banned by any specific law, viewbotting violates the Twitch platform Terms of Service, which do not allow “artificial inflation of metrics”. The punishment for the activity involves suspension or ban from the service rather than prosecution.
Is there a risk of getting banned after being targeted by viewbots?
Being aware of bot attacks used to harass streamers, Twitch differentiates between the cases. As per the platform support resources, the intent and behavior patterns are considered prior to implementing any actions. If a streamer is clearly a victim of bot attacks, they will be handled differently from those who purchased the bots knowingly.
Do popular streamers use bots to boost their channels?
Based on the research conducted by the streaming industry analyst Devin Nash, more than 75% of the biggest Twitch users display clear evidence of viewbotting or automated engagement. Viewbotter It may be unclear whether bots utilized by popular streamers are paid services, fan-based efforts, or platform glitches, but there is no doubt that viewbotting is not a problem of small streamers only.
How do I know if I am being viewbotted?
Using Twitch Insights, monitor the viewer list for any accounts that have been reported as bots. Pay attention to any sudden increases in the viewer number without raiding, shoutout or social promotion. Compare your follower growth rate with the viewer one – any sudden increase in viewers while the followers number is unchanged indicates fake engagement.
The more eagle-eyed Twitch users will have noticed that you can hook your Twitch account up to a YouTube account and allow automatic VOD uploads from Twitch to YouTube. You would think this is a good thing, but it isn’t. When you use that feature, the entirety of the VOD will be uploaded. You know, that multi-hour stream you just recorded? We are sure it is brilliant, but it isn’t quite YouTube material.
You see, YouTube viewers are probably not going to want to watch multi-hour videos. They are going to want to watch quick snippets, probably no more than 20-30 minutes in length. Maybe an hour max, if your content is good. Thankfully, this also works to your advantage. The more videos you have on your YouTube account, the more cash you rake in.
In this blog post, we’re going to walk you through the exact steps for editing and posting your Twitch VODs on YouTube. While we know that there are tools on Twitch that will let you edit your VOD on the website, we’re going to use another method. This is because we want you to have more control over the editing process. This will make for more views on YouTube. Download your Twitch VODs easy with our in house built tool.
Creating Twitch VODs
Twitch doesn’t create VODs by default. So, before we can start editing those Twitch VODs for YouTube (or providing more content for your Twitch viewers to see), you’ll need to enable VODs. This is easy:
Open up the Creator Dashboard
Select ‘Settings’
Click ‘Stream’
Look for the option ‘Store Past Broadcasts’
Turn this feature on
Fantastic! Now, every single Twitch stream will be stored as a VOD. Don’t worry if you have a stream that’s a little bit terrible. It happens to the best of us. You’re free to delete any VOD that’s created.
Downloading Your Twitch VODs
Have a VOD that you really want to share on YouTube? Great! Let’s give it a download!
This is how you do it:
Open up the Creator Dashboard
Look for ‘Content’
Look for ‘Video Producer’
Look for the VOD you want to download.
Click the button to the right of it and select ‘Download’.
Simple!
We recommend that you do this regularly, even if you don’t plan on uploading something to YouTube. Since September 2023, Twitch has put huge limits on how long VODs stay up. So, if you don’t download something, it could disappear from the face of the earth in as little as 7 days.
Editing Your Twitch VODs
The reason why we didn’t want you editing your Twitch VODs through the Twitch interface is that it doesn’t give you a ton of control. The ability to create thumbnails is a little bit sporadic too. Only some Twitch users can create custom thumbnails for their VODs. Oh, and we also want you to get used to editing for YouTube. You’re not going to be doing too much major editing here, but if your YouTube popularity starts to ramp up due to your twitch followers, then you’ll want to get fancier with your editing.
First things first, you’ll need to download some video editing software. There are plenty of options out there, but you won’t need anything too fancy for trimming your 6-hour Twitch epics into more manageable chunks. This means that you can get away with some free software. We recommend one of these:
How you edit your Twitch VOD here will be completely dependent on the software, but things should be fairly self-explanatory. All you need to do is:
Open up the Twitch VOD in the video editing package.
Use the trimming tools to trim down your sections.
Save as individual videos.
If you’re stuck, you’ll find plenty of advice online.
Your goal here is to split your Twitch VOD into smaller chunks. For example, with a 6-hour VOD, you can probably get 6-12 YouTube videos from it.
You don’t need to do any crazy editing here. Just the raw video should be fine. However, as you gain a bit more traction on Twitch and YouTube, we suggest that you cut out the more boring parts of your Twitch VOD uploads (and yes, we all create boring content at times!).
Uploading Your Twitch VODs to YouTube
Got your Twitch VODs? Fantastic! There’s one final part of the process. The most important part, really. We’re going to be uploading your Twitch VODs to YouTube.
This is simple, and is really a two-stage process since we’re going to want to create some custom thumbnails here too:
While you can upload multiple videos at once, we suggest that you only do one of your Twitch VOD edits per day. This will keep people’s eyes on your channel. It also makes things a little bit messy. So, if you have trimmed a 6-hour Twitch epic into 6 videos, you have 6 days of content.
Once your video is uploaded, hit the pencil button next to it. This will allow you to edit the details. It is from this page that you can edit the thumbnail. You can use any section of the video for your thumbnail, but we prefer to upload custom thumbnails to help with branding on the channel (all thumbnails should look roughly the same).
Once that’s done, you’re done. Your video will be visible and you can start to rake in those sweet YouTube views!
Optimise Your Video Before You Upload
However, editing is not everything here because even the best video becomes completely useless if nobody can find it or, even worse, if you fail to upload it. Remember, YouTube is not a hosting service; it is a search engine.
Title – The title of your video has to reflect what you have on there and spark the viewer’s interest in it. Make sure you mention the game or your stream by name and keep your titles within 60 characters. Example: “I Clutched a 1v5 in Valorant and the Chat Went Insane” is a thousand times better than “Valorant Stream Highlight #47.”
Description – You need at least 150-200 words in the description field. Tell people what is going on in your video, provide timestamps to key moments in the video, put a link to your Twitch account, and other socials. The most important keywords are typically added in the very first two sentences since that part appears in YouTube snippets below the “Show More” cut-off line.
Tags – There are numerous online services (e.g., TubeBuddy, VidIQ) which offer tag recommendations for any type of content. Tags still play their role in categorization by YouTube, especially for gaming videos belonging to niche categories.
Thumbnail – The thumbnail is one of the most crucial aspects of making your video clickable. A customized one performs way better than the default, automatically generated YouTube thumbnail. Use the screen capture with the most exciting moments in your video, add some bold text that reflects your title, and try not to use images that lose clarity when downsized. Find thumbnail ideas for your next video with YouTube Thumbnail Downloader.
Chapters – Add timestamped sections in the description to create chapters. Chapters are displayed right in the search result, so they boost the click-through rate and watch time.
How to Turn One Stream Into a Week of YouTube Content
This is the part that streamers often overlook. A 4-hour stream does not only provide you with a YouTube video; you get to generate a library of content if you play your cards right.
You can generate a full 20-30 minute edit of the stream as a highlight video, one or two smaller videos of 5-10 minutes dedicated to some parts of the stream, as well as several YouTube Shorts from some of the best moments, and finally, content for TikTok and Instagram Reels, which will include the same vertical edits.
In total, you end up with 8-10 different pieces of content, generated from one stream. Yes, it takes time and effort to edit them all, but the benefits will multiply. Any video you upload to YouTube serves as a permanent search result for your Twitch account. As new people start streaming to your page from YouTube, they will first check out how many followers and views you have on your channel.
If those numbers are satisfactory, there’s a higher chance that they will continue watching and eventually subscribe to your page. Here you see how promoting yourself on Twitch and YouTube complement each other.
The Full Workflow
Step
Action
Tool
1
Enable Store Past Broadcasts
Twitch Creator Dashboard
2
Download your VOD
Twitch Video Producer / Streamerplus VOD Downloader
3
Edit down to highlights
DaVinci Resolve / Kdenlive / CapCut
4
Replace any copyrighted music
Epidemic Sound / YouTube Audio Library
5
Create custom thumbnail
Canva / Photoshop
6
Research title and tags
TubeBuddy / VidIQ
7
Upload with full metadata
YouTube Studio
8
Add chapters and schedule
YouTube Studio
Frequently Asked Question
Have any questions?
All questions about Twitch bits answered, below
Still have Questions?
Get all the answer from our sales team who are available 24/7
Should I be editing my VODs or uploading them raw?
Uploading raw VODs works but is not optimal for YouTube. An unedited raw VOD requires quite a lot of time commitment on behalf of your random YouTube user, who may not even know who you are. Condensing the best 20-30 minutes from the 4 hours of streaming is beneficial not only to your viewers but also to your metrics.
What is a good length for my YouTube VOD videos?
There’s really no optimal video length but 15-30 minutes works just fine when it comes to gaming highlights. Lengthy enough to fit the content, not too lengthy to be able to watch everything without losing the pace. However, if you have some great streams, feel free to make a longer video but don’t extend it beyond one hour.
Will Twitch restrict me from using my VOD for YouTube?
It won’t unless you are affiliated with Twitch. The service’s terms of service require all Affiliates and Partners to allow a 24-hour grace period between finishing their stream and publishing the content somewhere else.
Can I upload my video which includes copyrighted music?
No. Make sure to remove it because YouTube is very restrictive when it comes to copyrighted material. Their Content ID system will either mute the clip, block your video in some countries, or divert profits earned from the video to the rights owner. There are plenty of royalty-free options available on Epidemic Sound or YouTube Music Library.
How often should I upload VOD content to YouTube?
The less often, the better as far as YouTube is concerned. One properly edited upload every week and consistently keeping to it for the next six months will yield far better results than uploading a couple of videos in the beginning of January and then forgetting about it.
My VOD expired before I was able to download it — what now?
There’s no way to recover your VOD if it expired on Twitch. From now on, turn on Store Past Broadcasts and download your clips regularly. Think of this as a process of backing up an important document.
 Twitch
 Convert Twitch Bits to USD
 Find Channel ID
 Buy Youtube Subscribers